Making great products involves listening to your customers and acting on their feedback. Olvy’s Jira integration helps you bridge feedback with execution - and now, even automate your release communication.
With Jira + Olvy, you can:
- Automatically generate release notes from Jira versions ✨
- Turn feedback into actionable Jira tickets
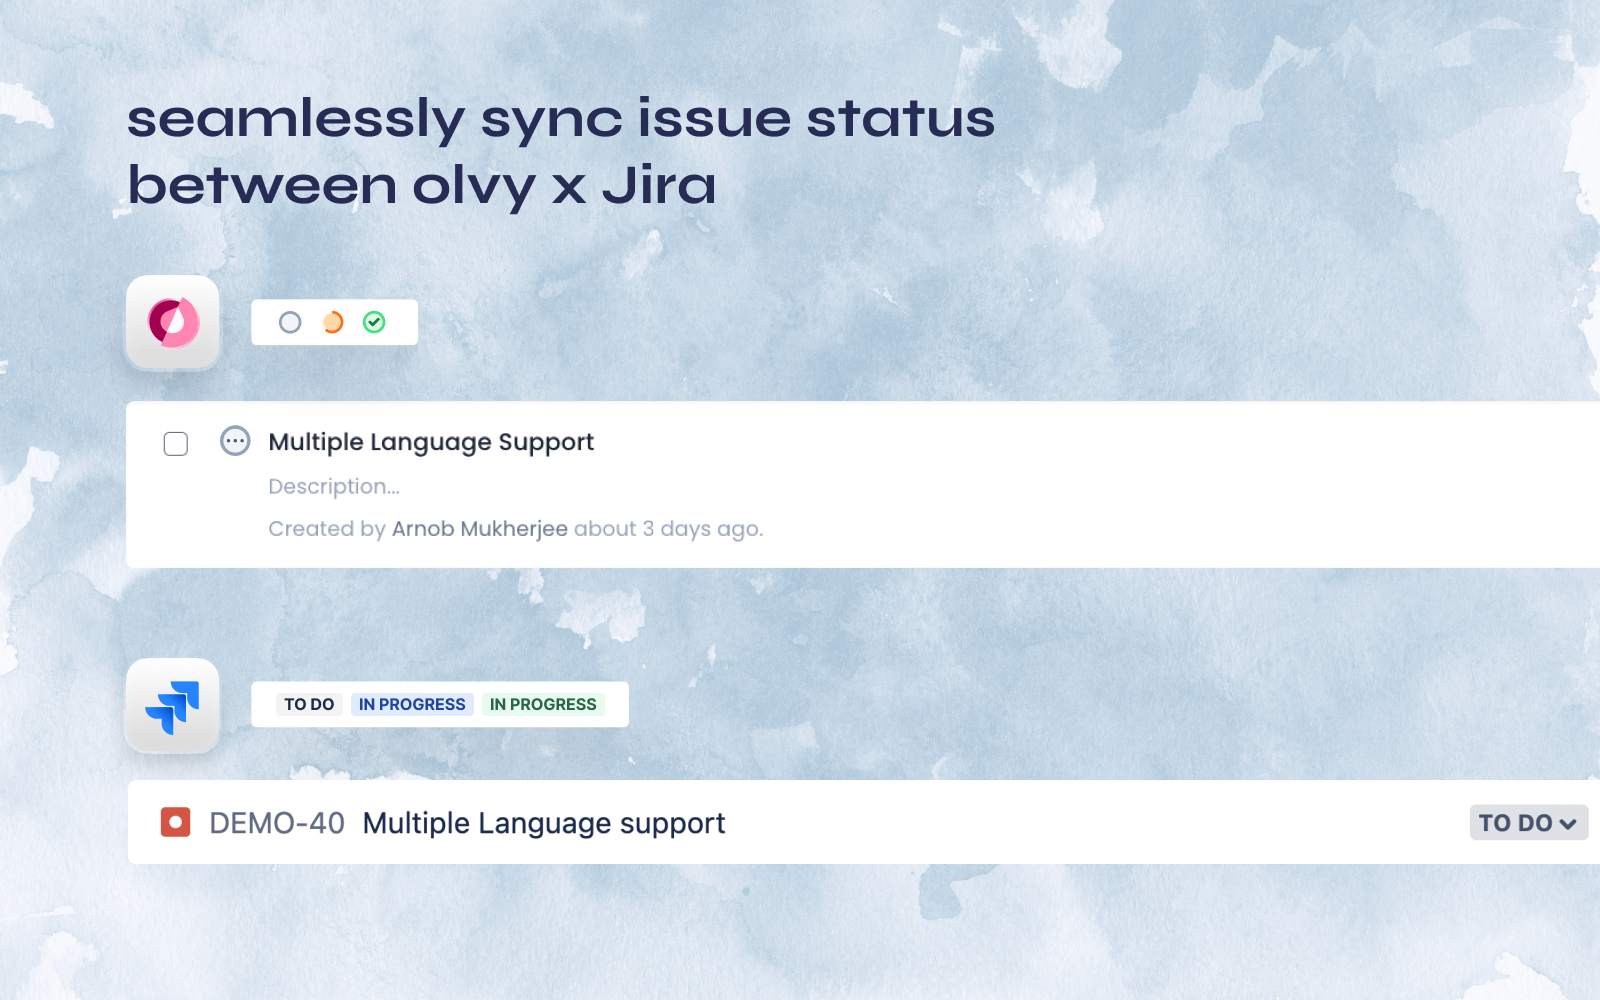
- Sync issue progress back to Olvy
- Notify users when work is complete
Setting Up the Integration
- Head on to the Workspace Settings > Integrations.
- Here you’ll see a list of integrations and once you find Jira, authorize your Jira Workspace with Olvy.
- Once the integration is done, you can -
- Start creating tickets and attach relevant feedback with those tickets from Olvy. You will find these tickets on your Jira with a link that directs to all the relevant feedback collected on Olvy.
- Create draft release notes in Olvy Changelogs whenever a version in Jira is marked 'Released'.
Auto Generate Draft Releases in Olvy from Jira
Automate release note creation directly from Jira.
What it does
When a version is marked as released in Jira:
- Olvy automatically creates a draft release
- Pulls in relevant issues from that Jira version
- Pulls release notes text from specific Jira fields of those Jira issues
How to configure
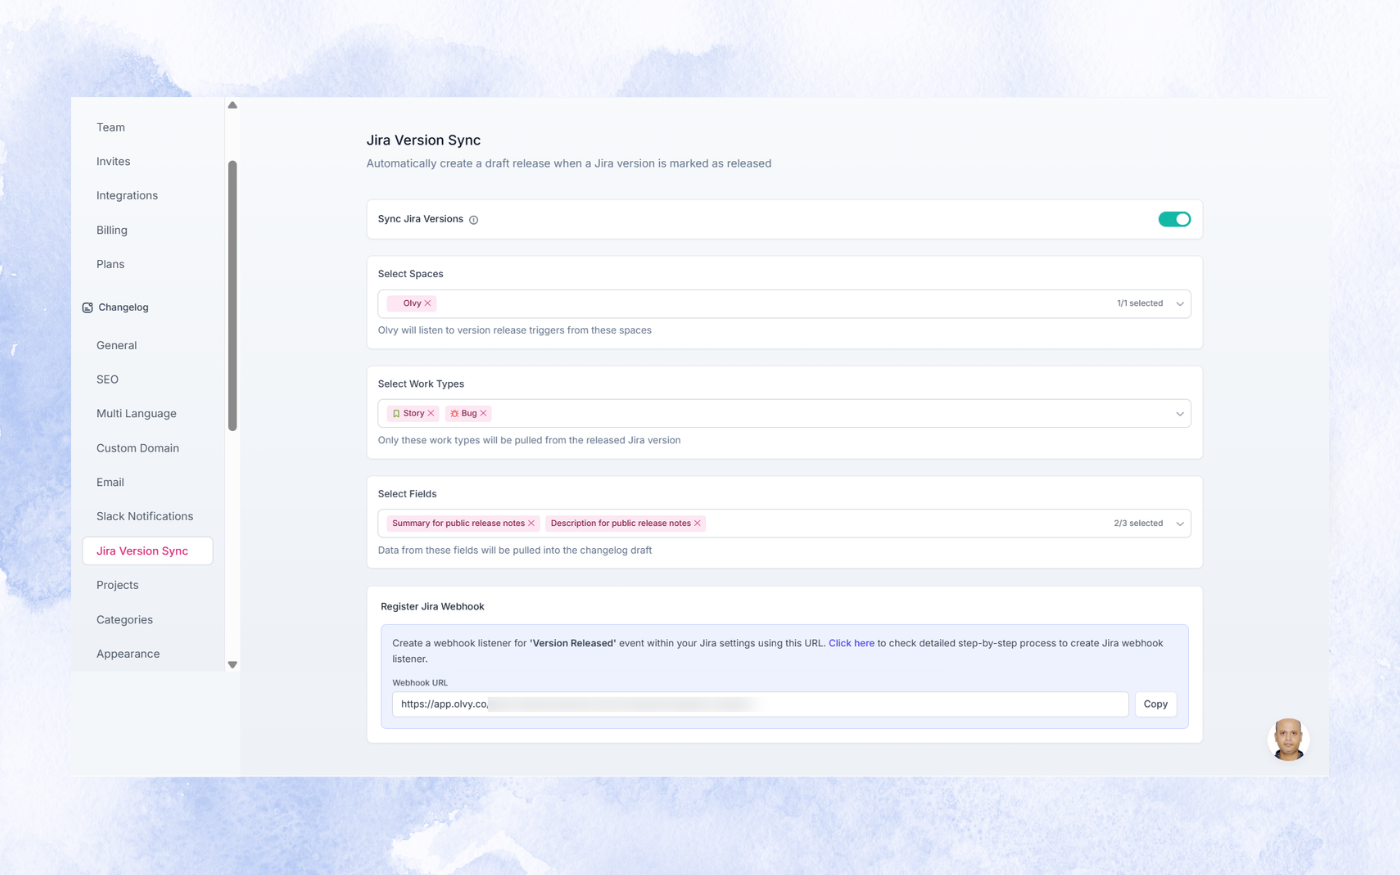
- Go to Changelogs → Settings → Jira Version Sync
- Enable Sync Versions
- Configure:
- Jira Projects - Olvy listens for version release events from these projects
- Work Types - Only issues with selected types are included
- Fields - Select up to 3 fields to pull release note content (used in the same order for draft creation)
4. Register Webhook
- Copy the webhook URL from Olvy
- Add it in Jira for the Version Released event
- Refer this doc for detailed steps.
Once set up, whenever a version is released in selected Jira projects, Olvy automatically creates a draft release in your changelog.
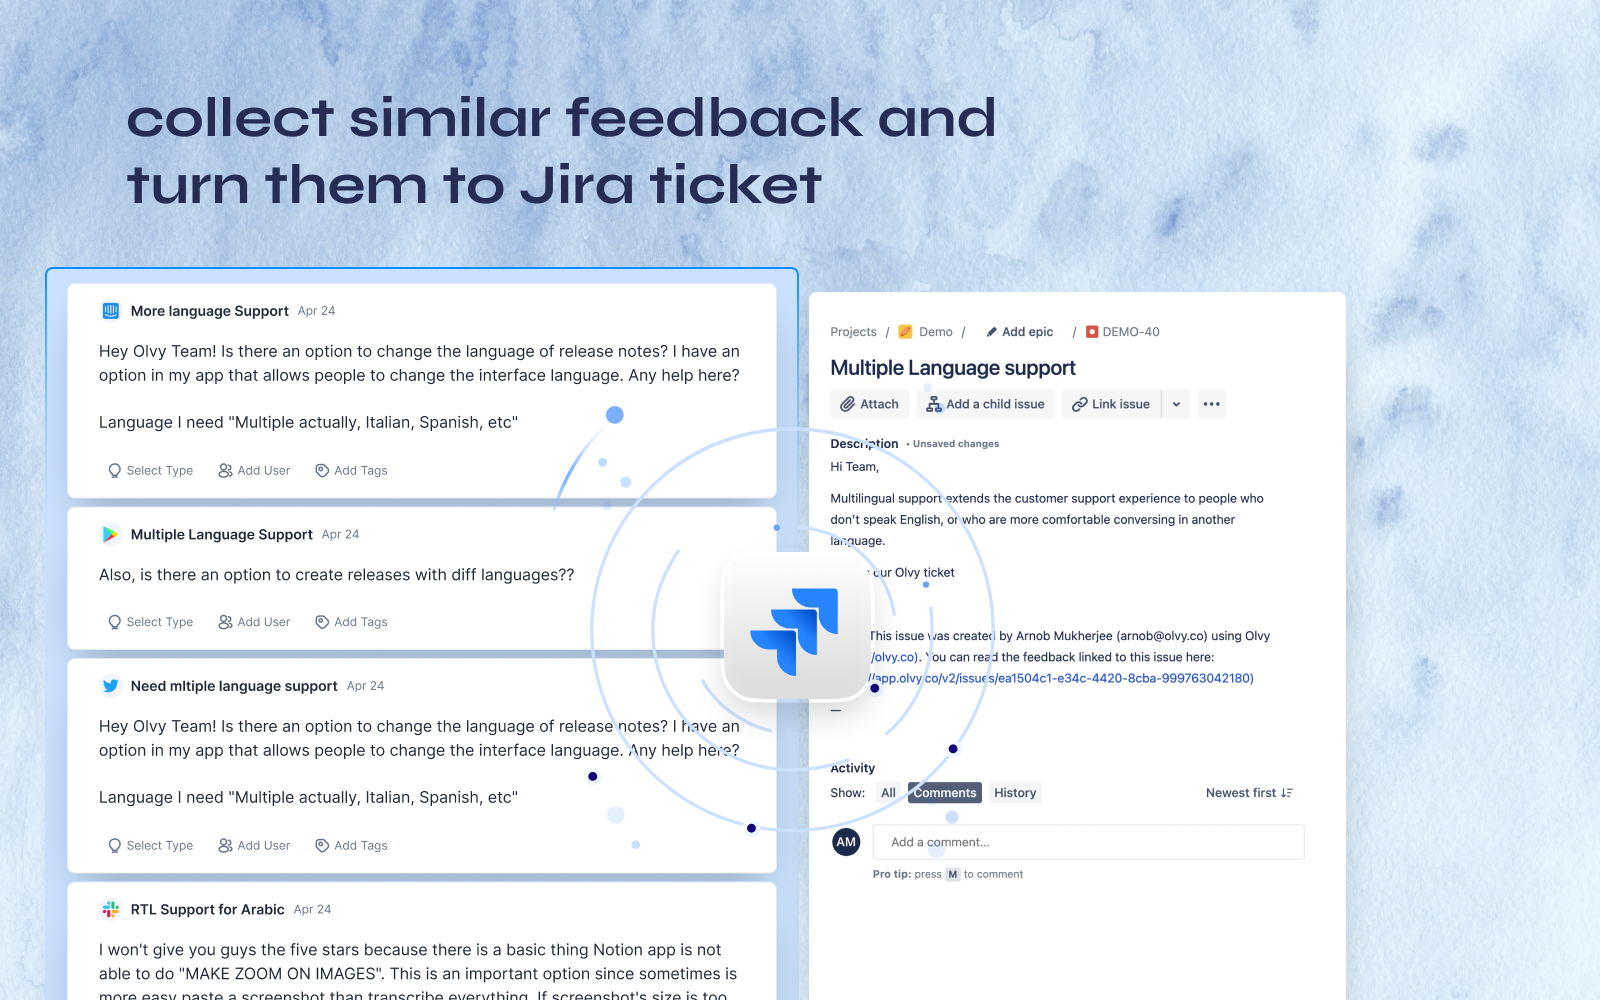
Creating Tickets with Olvy
Once you find some users talking about the same thing, you can club their feedback and attach them to create a Jira ticket from Olvy and pass this context to your team with the ticket.
You can make your desired changes on Jira or on Olvy and work seamlessly.
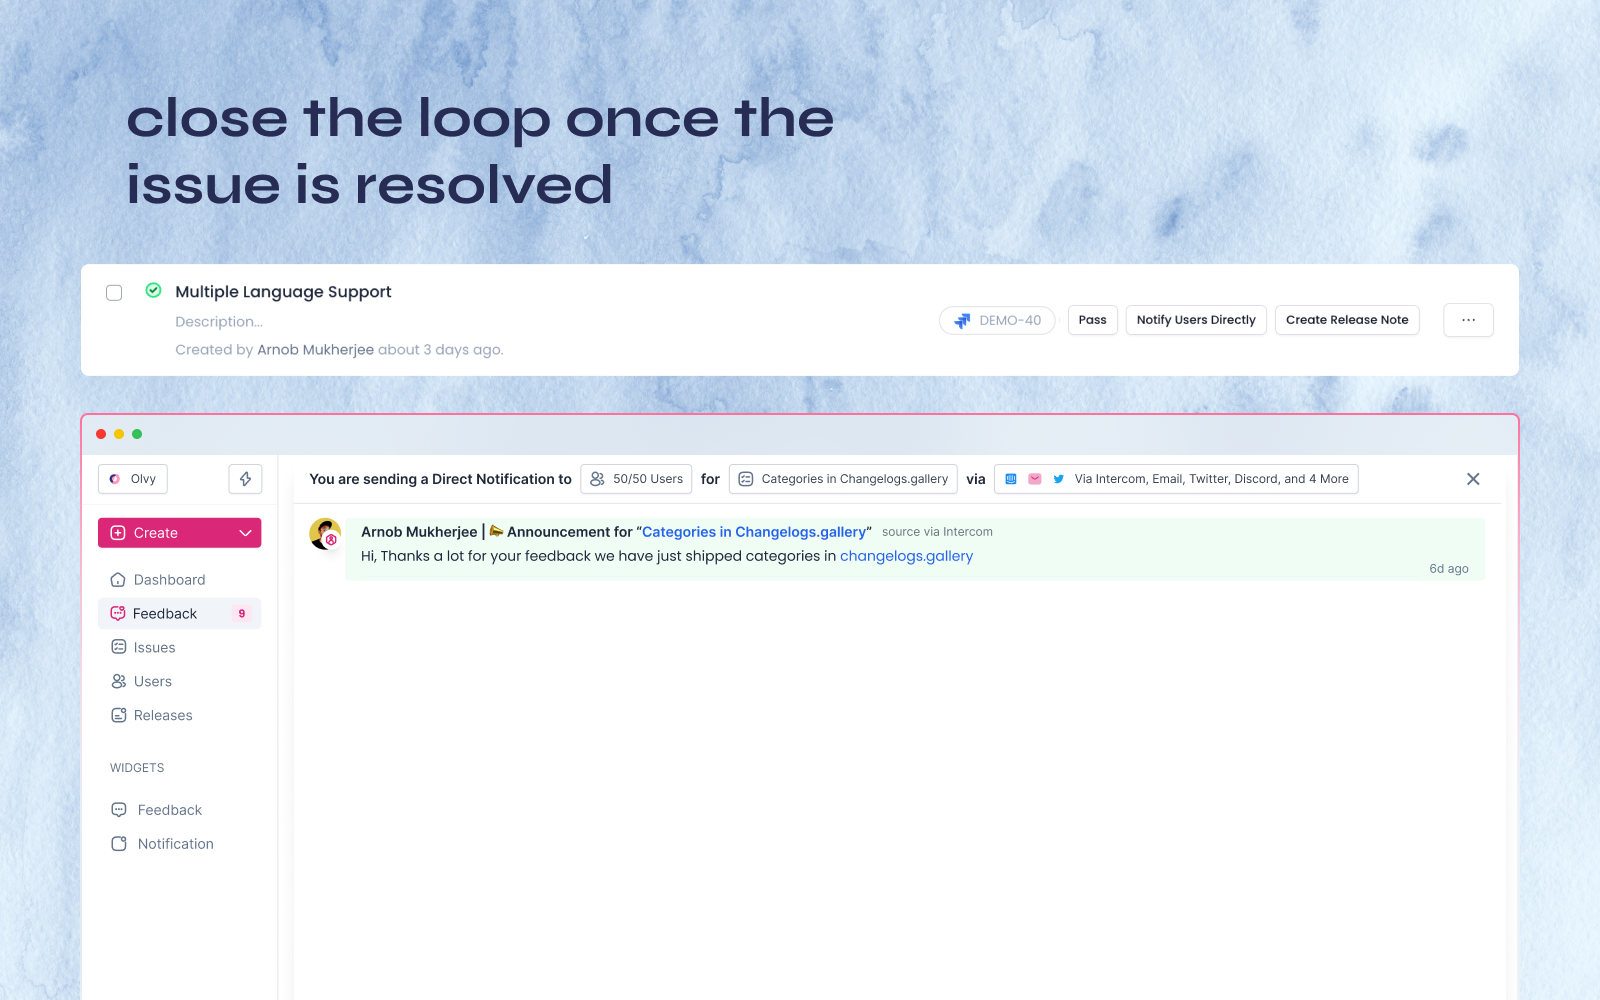
Once these issues are resolved, you can move over to announcements to inform users. Here, you can send an announcement to multiple users and to various sources attached with this issue, all in one click.
Summing up, Olvy’s Jira Integration helps you with
- Work effortlessly across Olvy and Jira
- Automatically generate draft release notes from Jira versions
- Share rich user context with product and engineering teams
- Track progress seamlessly in one place
- Close the loop by notifying users when issues are resolved