Once you've created an announcement widget, you can enhance its appearance and tailor it to your brand using the widget builder. Let’s understand the builder in detail.
On the right side, you can preview all your changes to the widget and how it will look in your app. On the left side, you have all the options to customize the widget.
You can either publish the widget, save it to drafts, or delete it permanently by clicking on the action buttons in the top right corner.
Here’re the editing options you’ve on the builder:
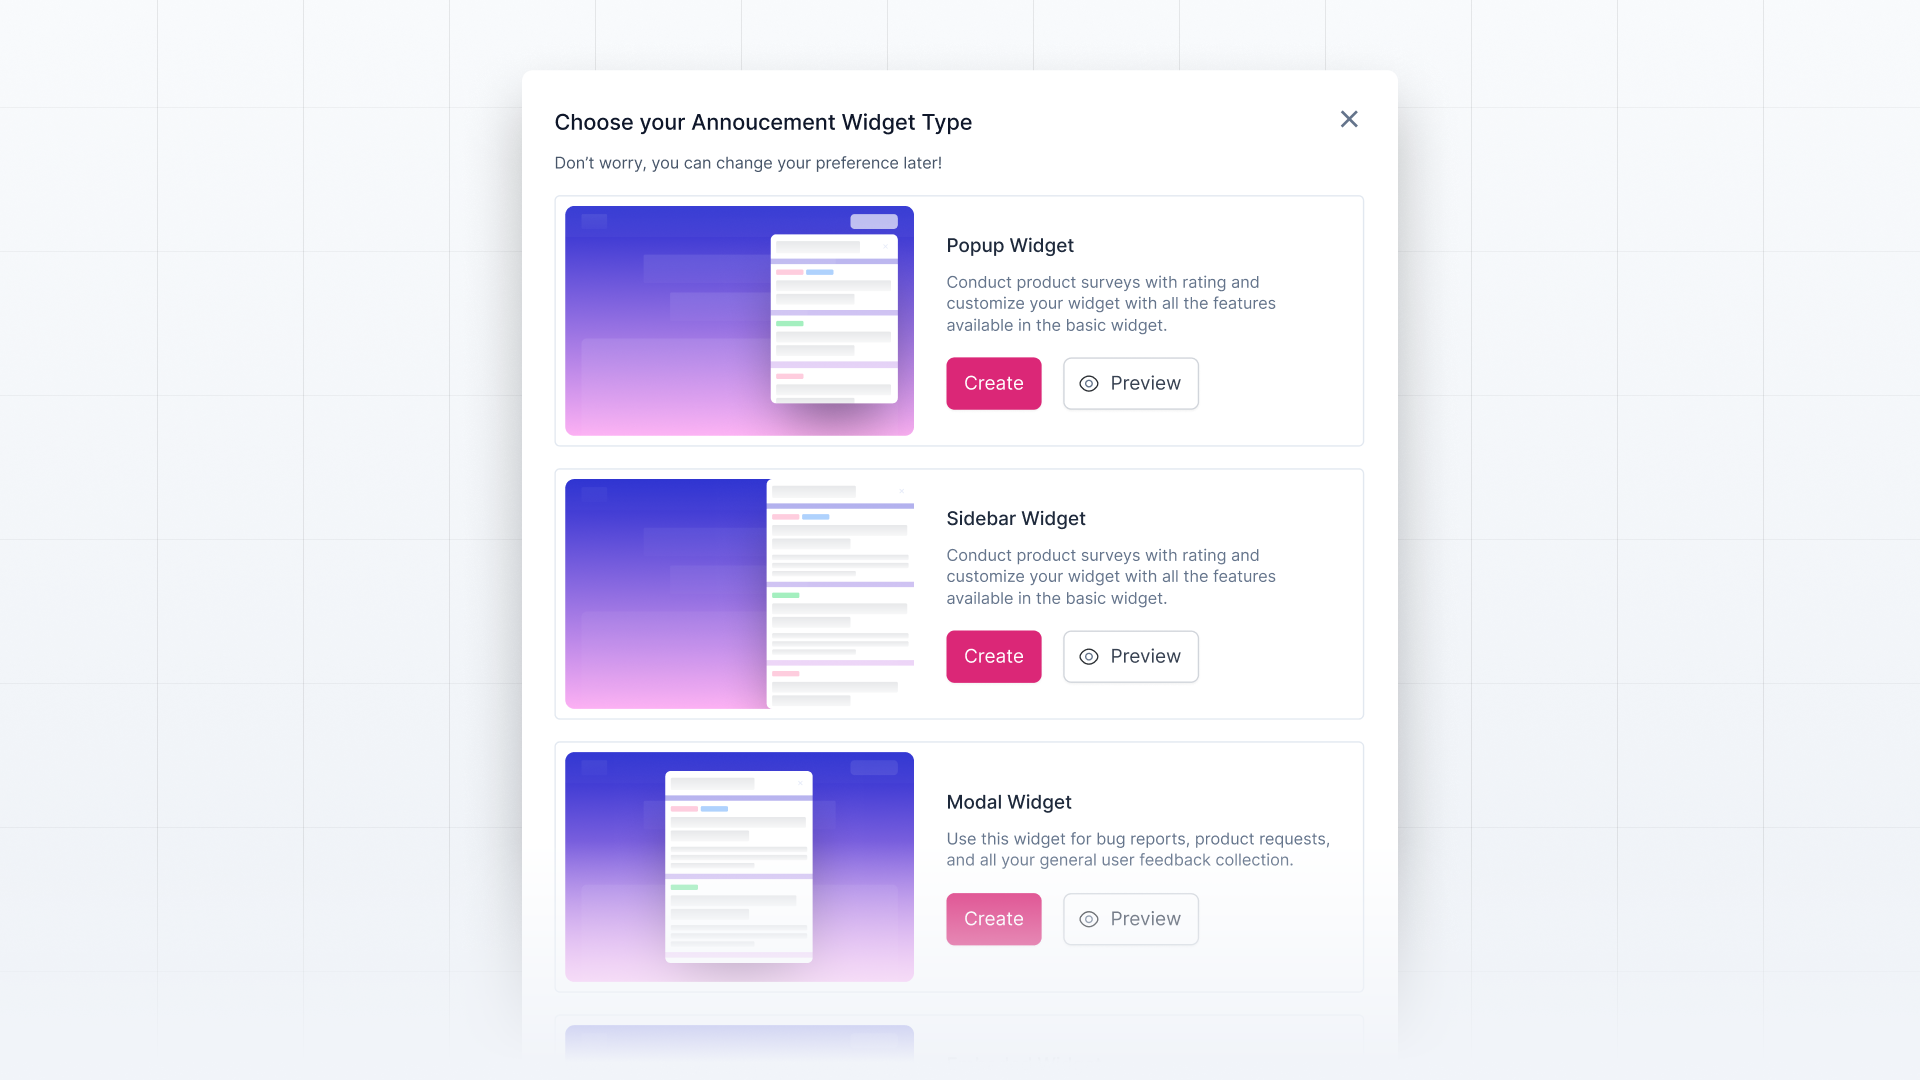
Overview
Here, you’ll see the widget type on top that you can change based on the one you want. You can choose between Modal, Sidebar, Embed, and Popup.
Then, you can add projects or categories to the widget, after which the widget will only show releases under added projects and categories.
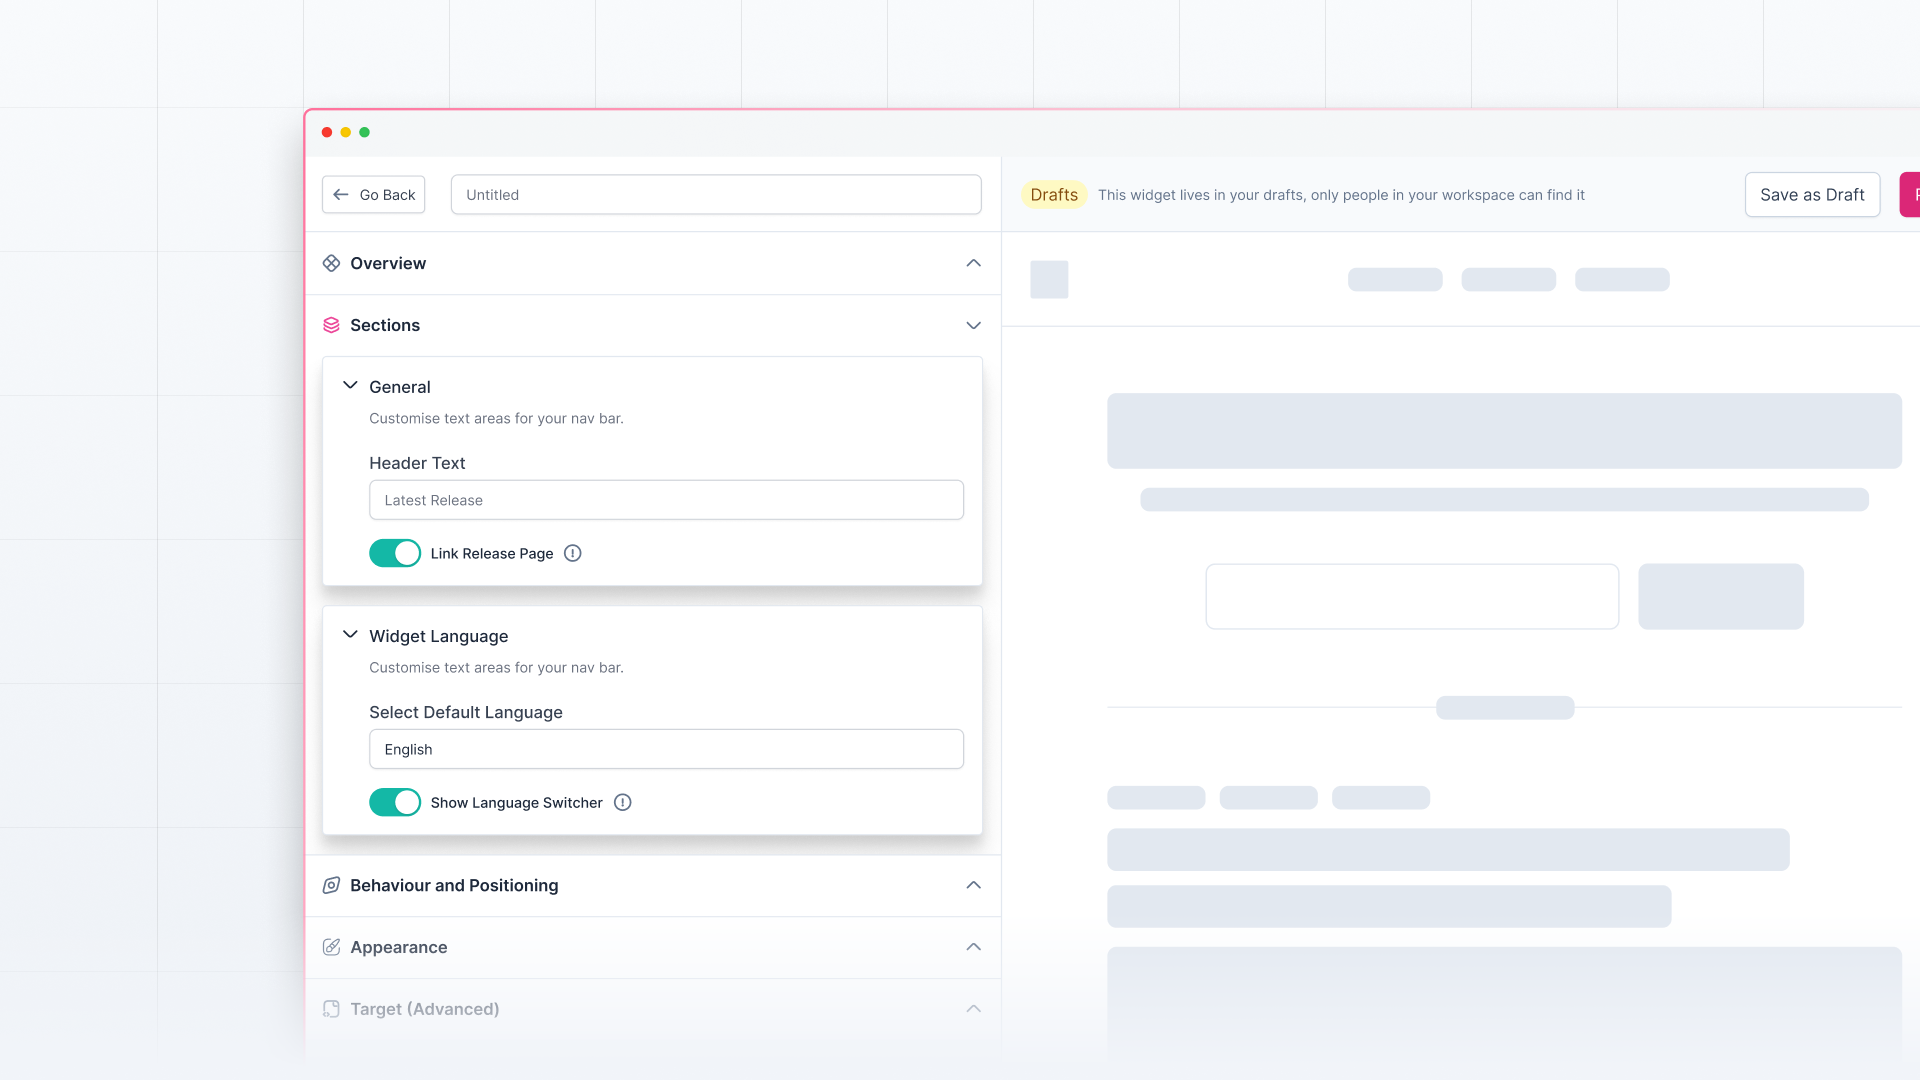
Sections
Here, you can customize things like —
- Adding header text to the announcement widget.
- Linking the widget to your Changelog
- Selecting the widget language for non-English users.
Behavior and Positioning
Here, you can customize the widget's behavior and unread indicator:
- Choose whether to auto-show the widget
- Choose whether to show the compact release card or the complete releases.
- Choose whether to show the unread release count on the trigger element. If yes, then where the unread indicator should counter.

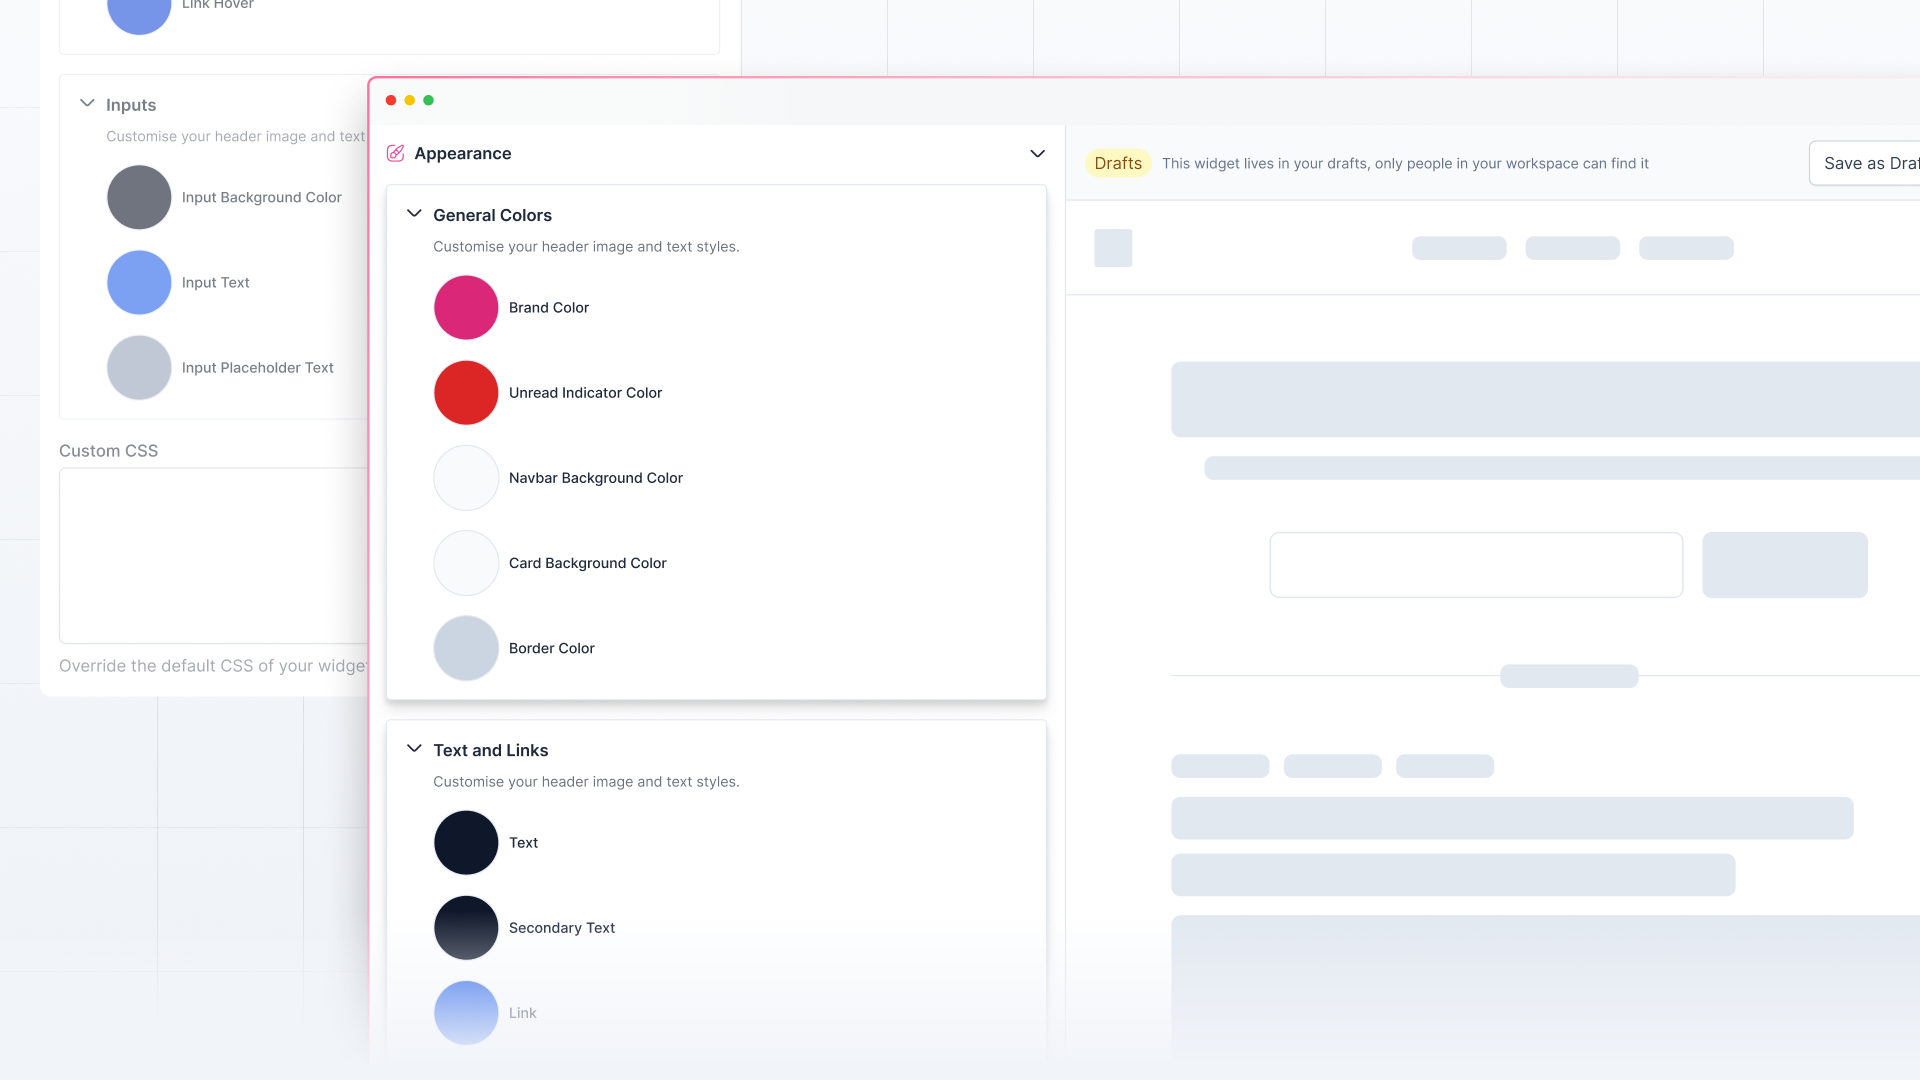
Appearance
Here, as the name suggests, you can change the appearance of your widget:
- Customize the general colors such as brand color, unread indicator color, background, nav background, card background, and border color.
- Change the text color and link colors.
- Customize the input background, text, and placeholder color.
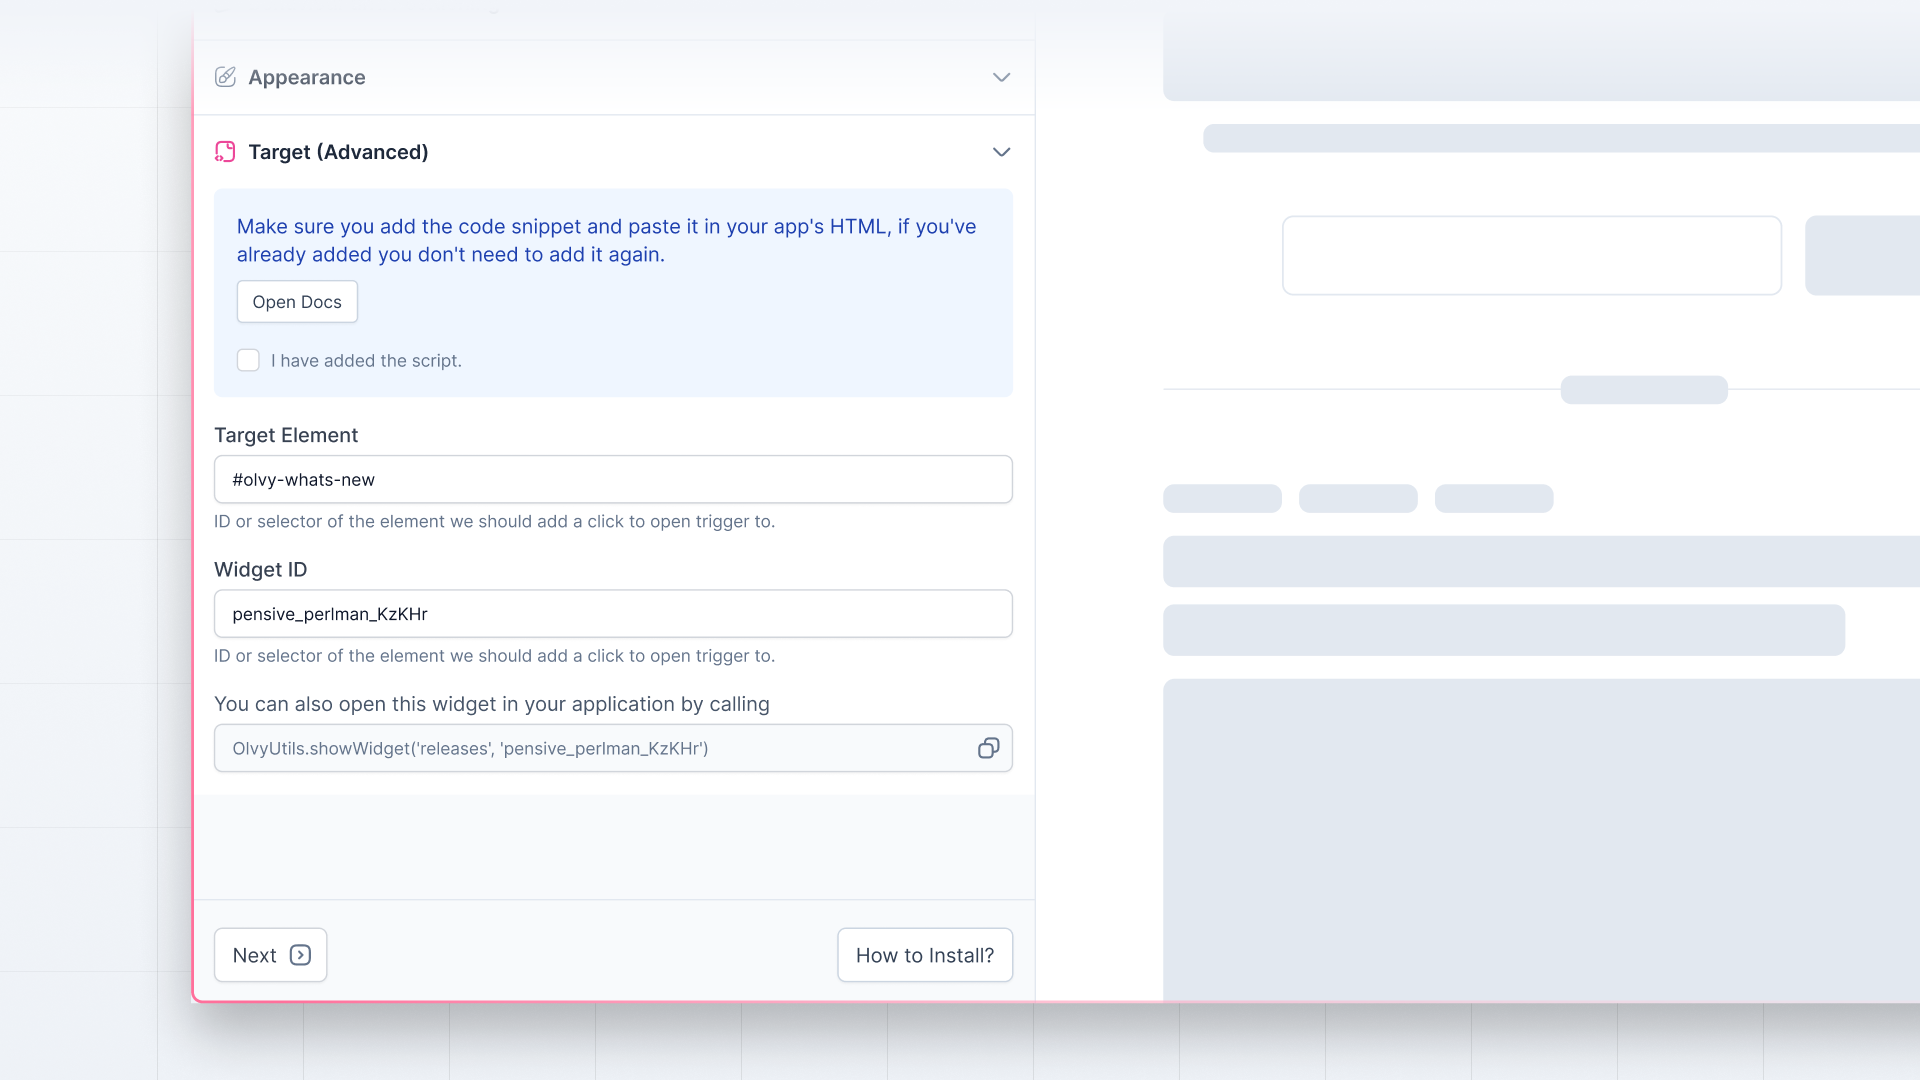
Advanced Settings
In the advanced settings, you can:
- Add the ID or selector of the element on which click to open trigger will be added
- Add page rules to the widget to select which pages you want to show the widget on
- Add custom CSS and override the default CSS of the widget
- At last, you can see the widget id that you can use to call the widget in your application.
Now, you can start creating and customizing the widget to launch it in your app for your users. If you need any help with setting up the widget, check out the detailed documentation here.