Once you’ve thousands of feedback collected in a place, it becomes quite difficult to organize and enrich that feedback manually. But you can easily do so with Olvy AI Autofills. Let’s understand how you can best use Olvy AI Autofills.
Creating up Autofills
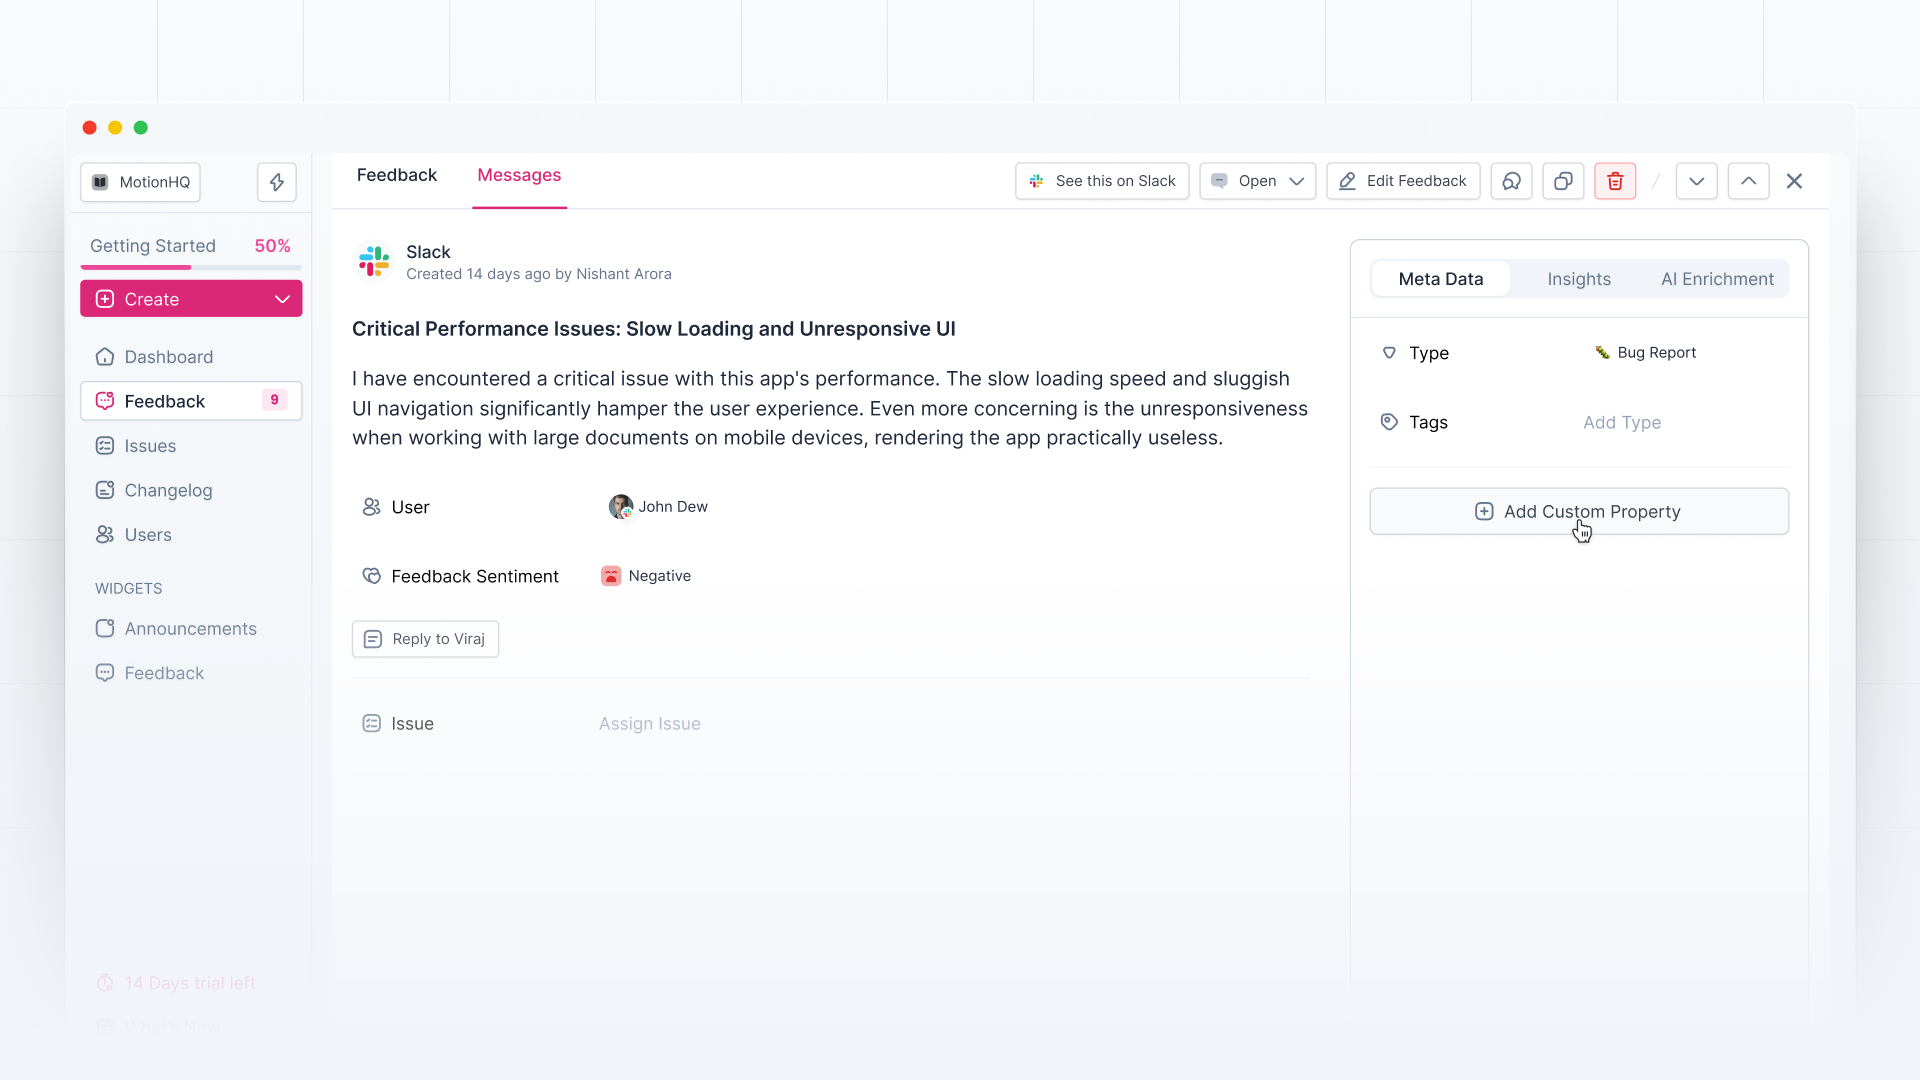
Head over to any of your feedback profiles and click on "Add Custom Property."
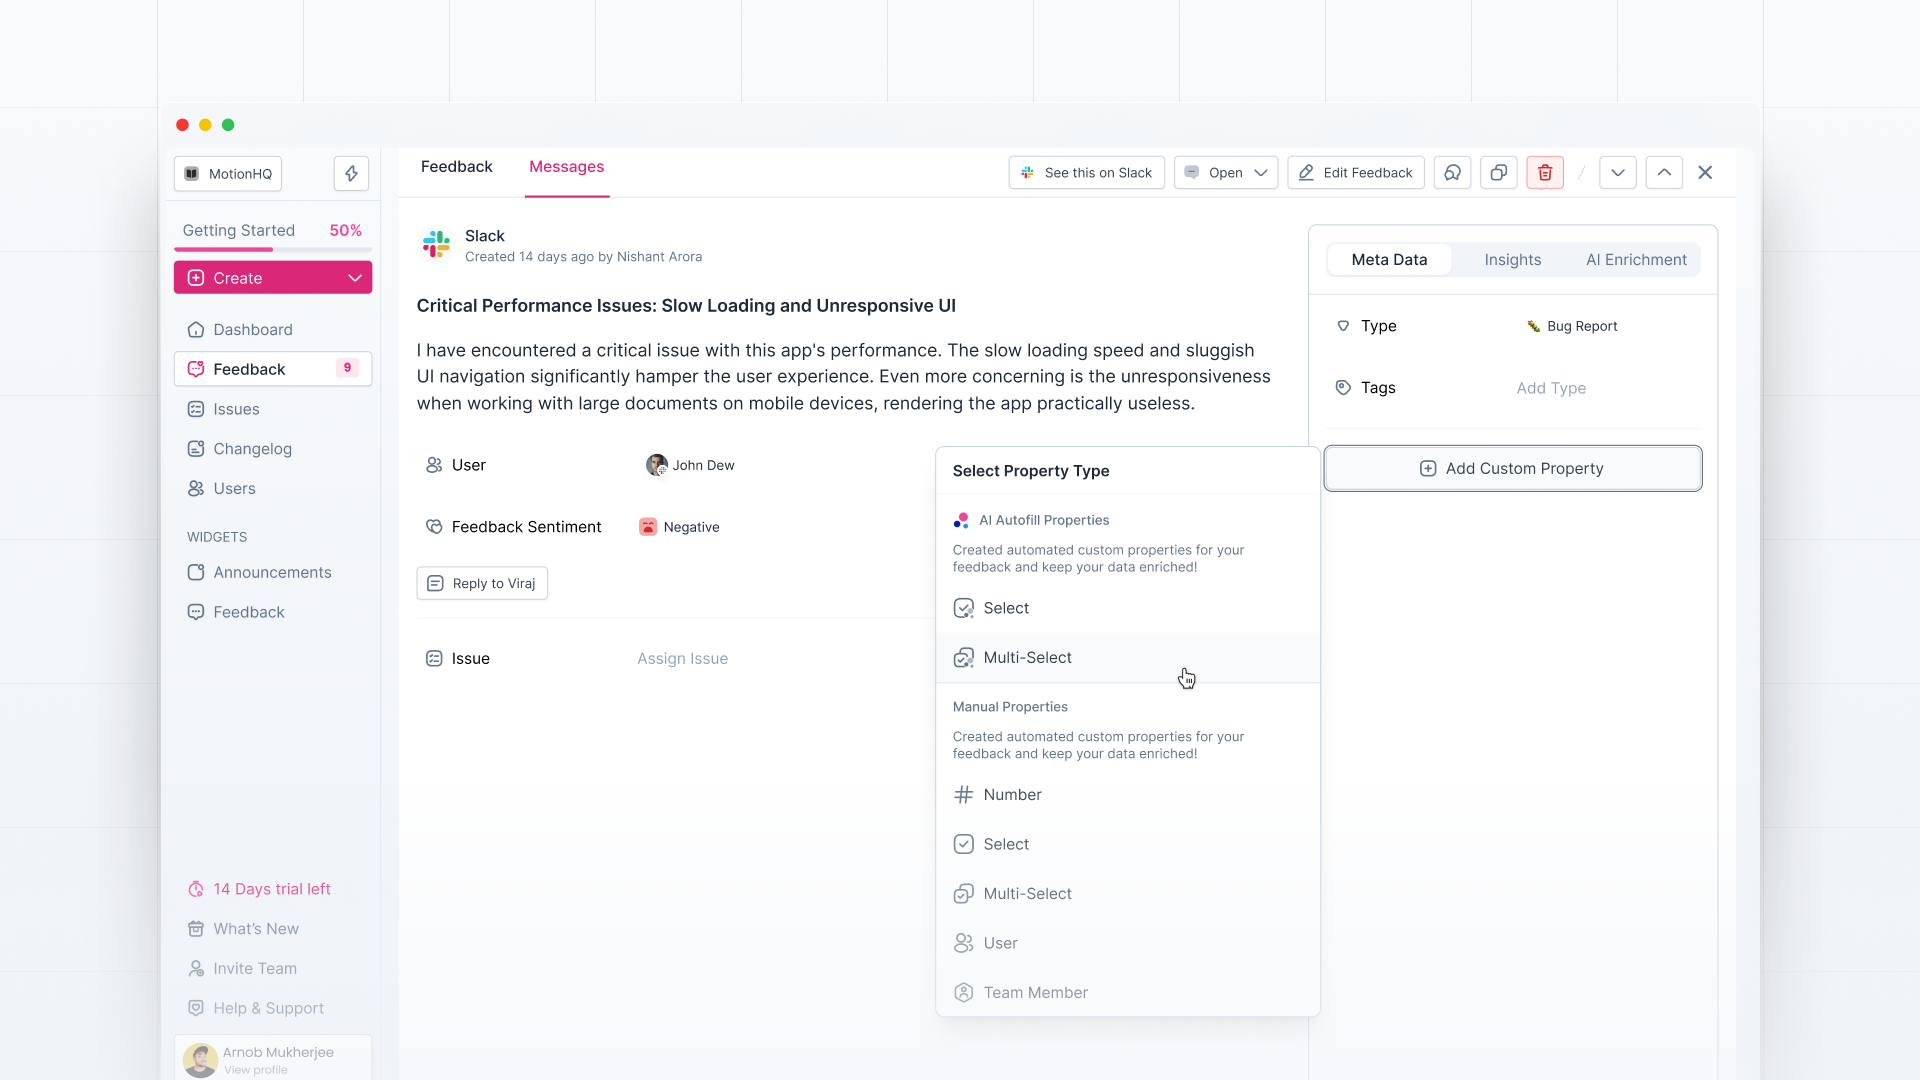
Click once, and a pop-up appears with autofill and manual properties. Choose your preferred property type and set it up.
Currently, Autofill is available for multi-select and single-select property types, allowing you to create automated selections.
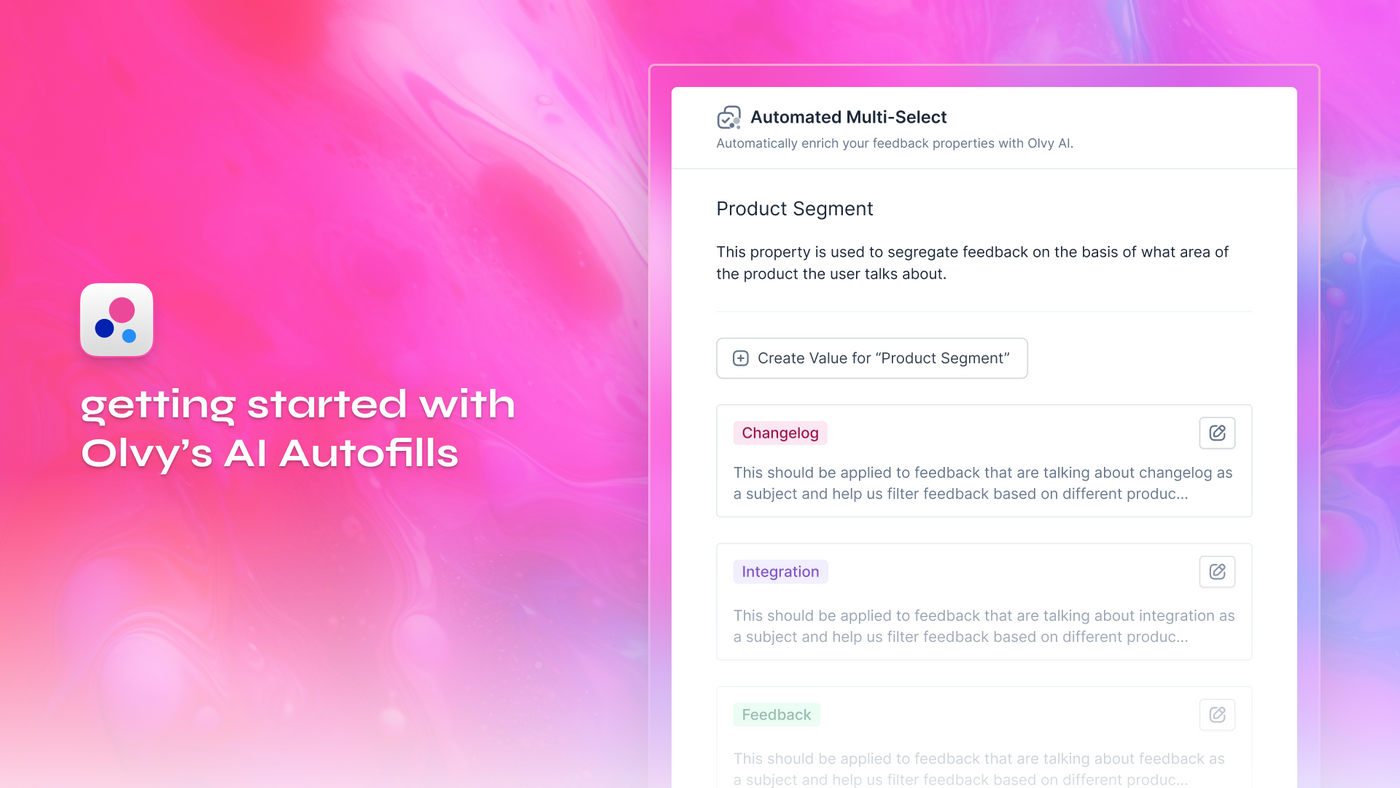
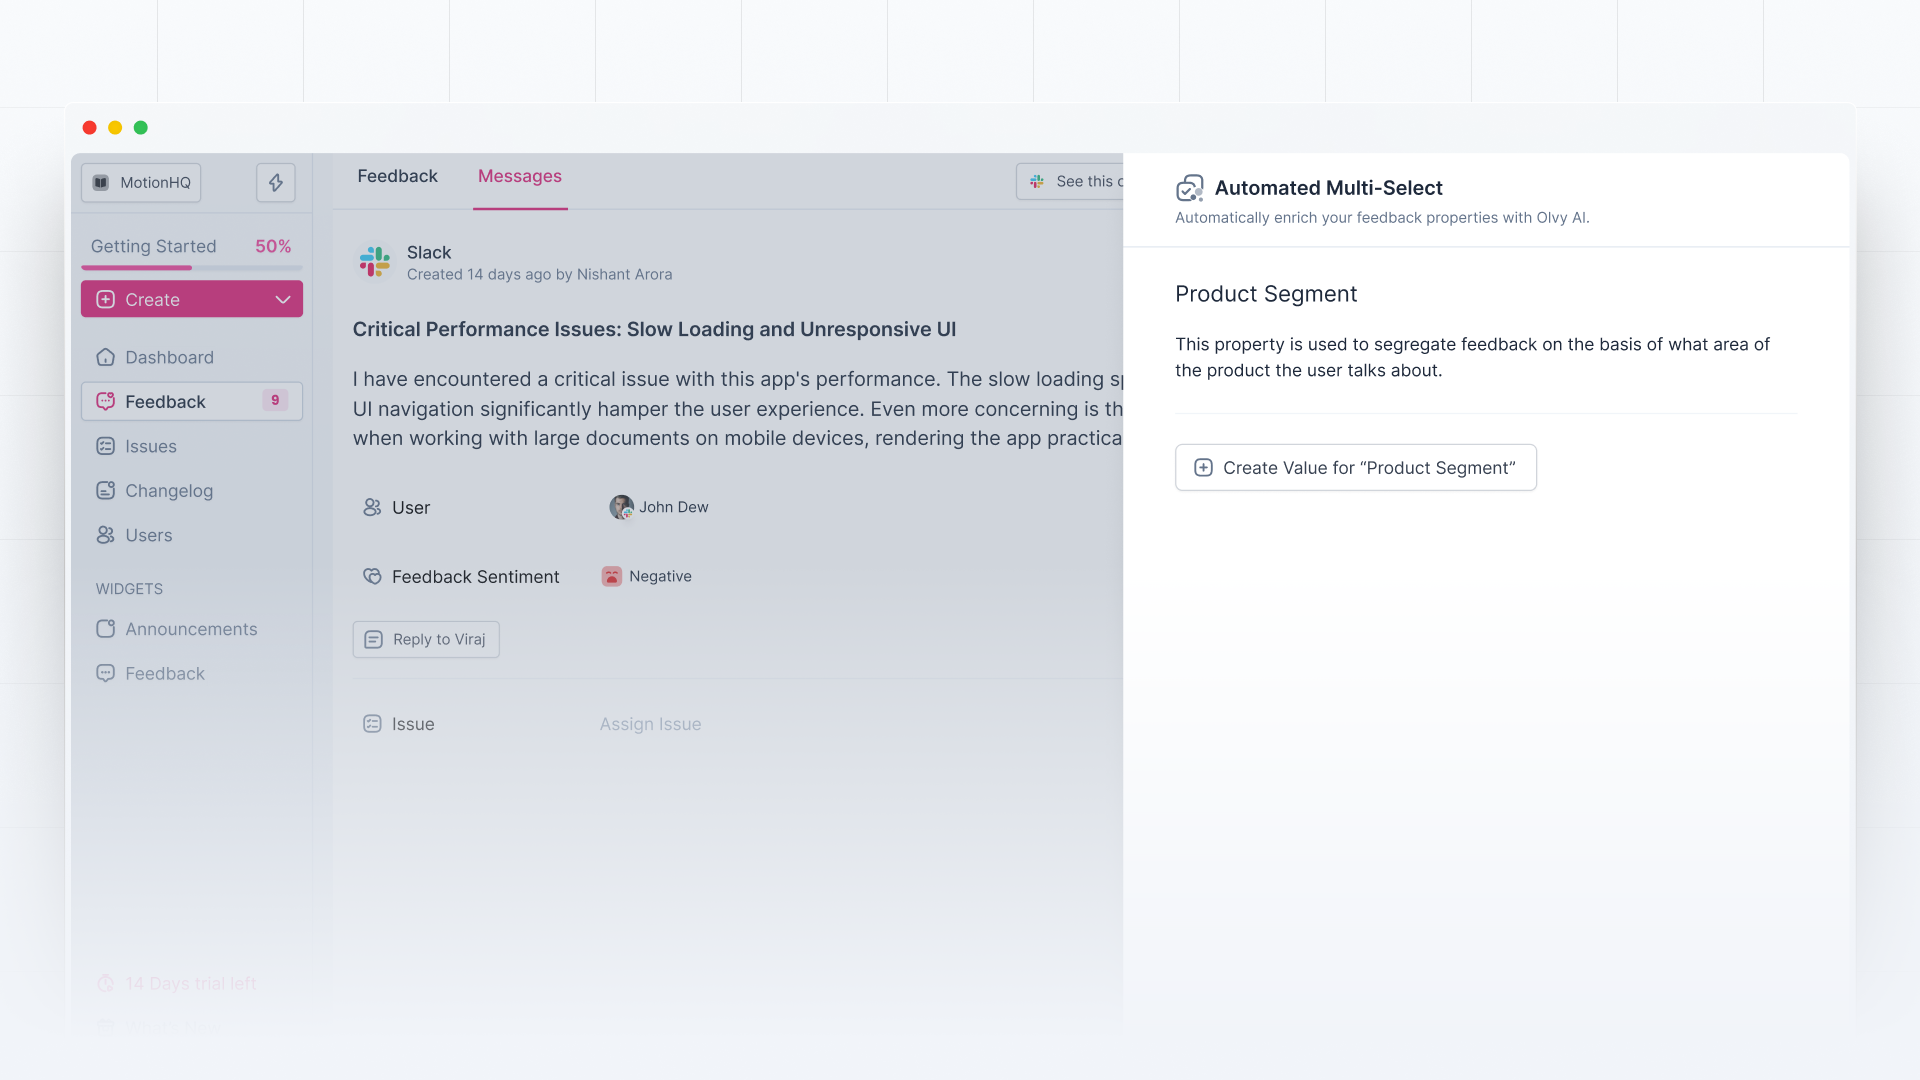
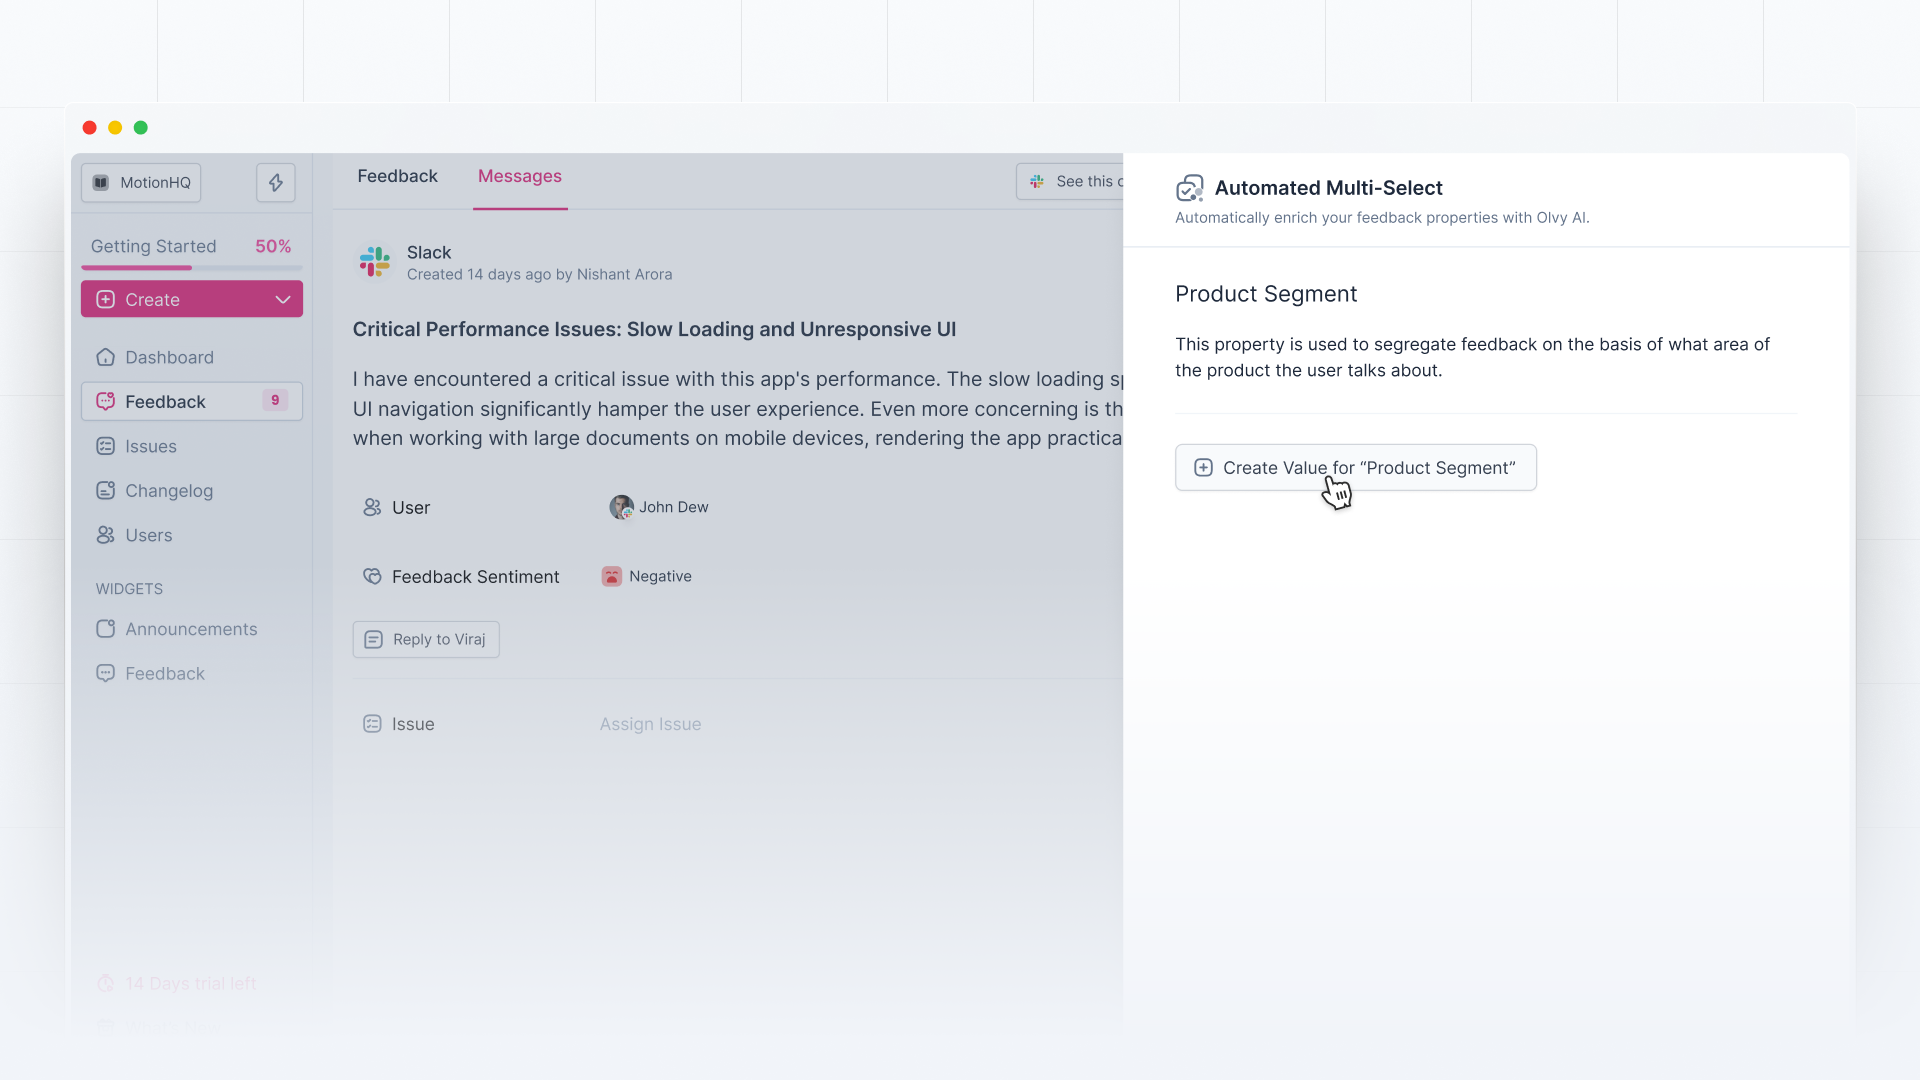
Once an autofill property type is selected, a creation slideover would open for autofill property creation.
Name it just like any other custom property, and add a brief description explaining how it aids in segregating feedback. This description is crucial for Olvy AI to understand the purpose of your autofill.
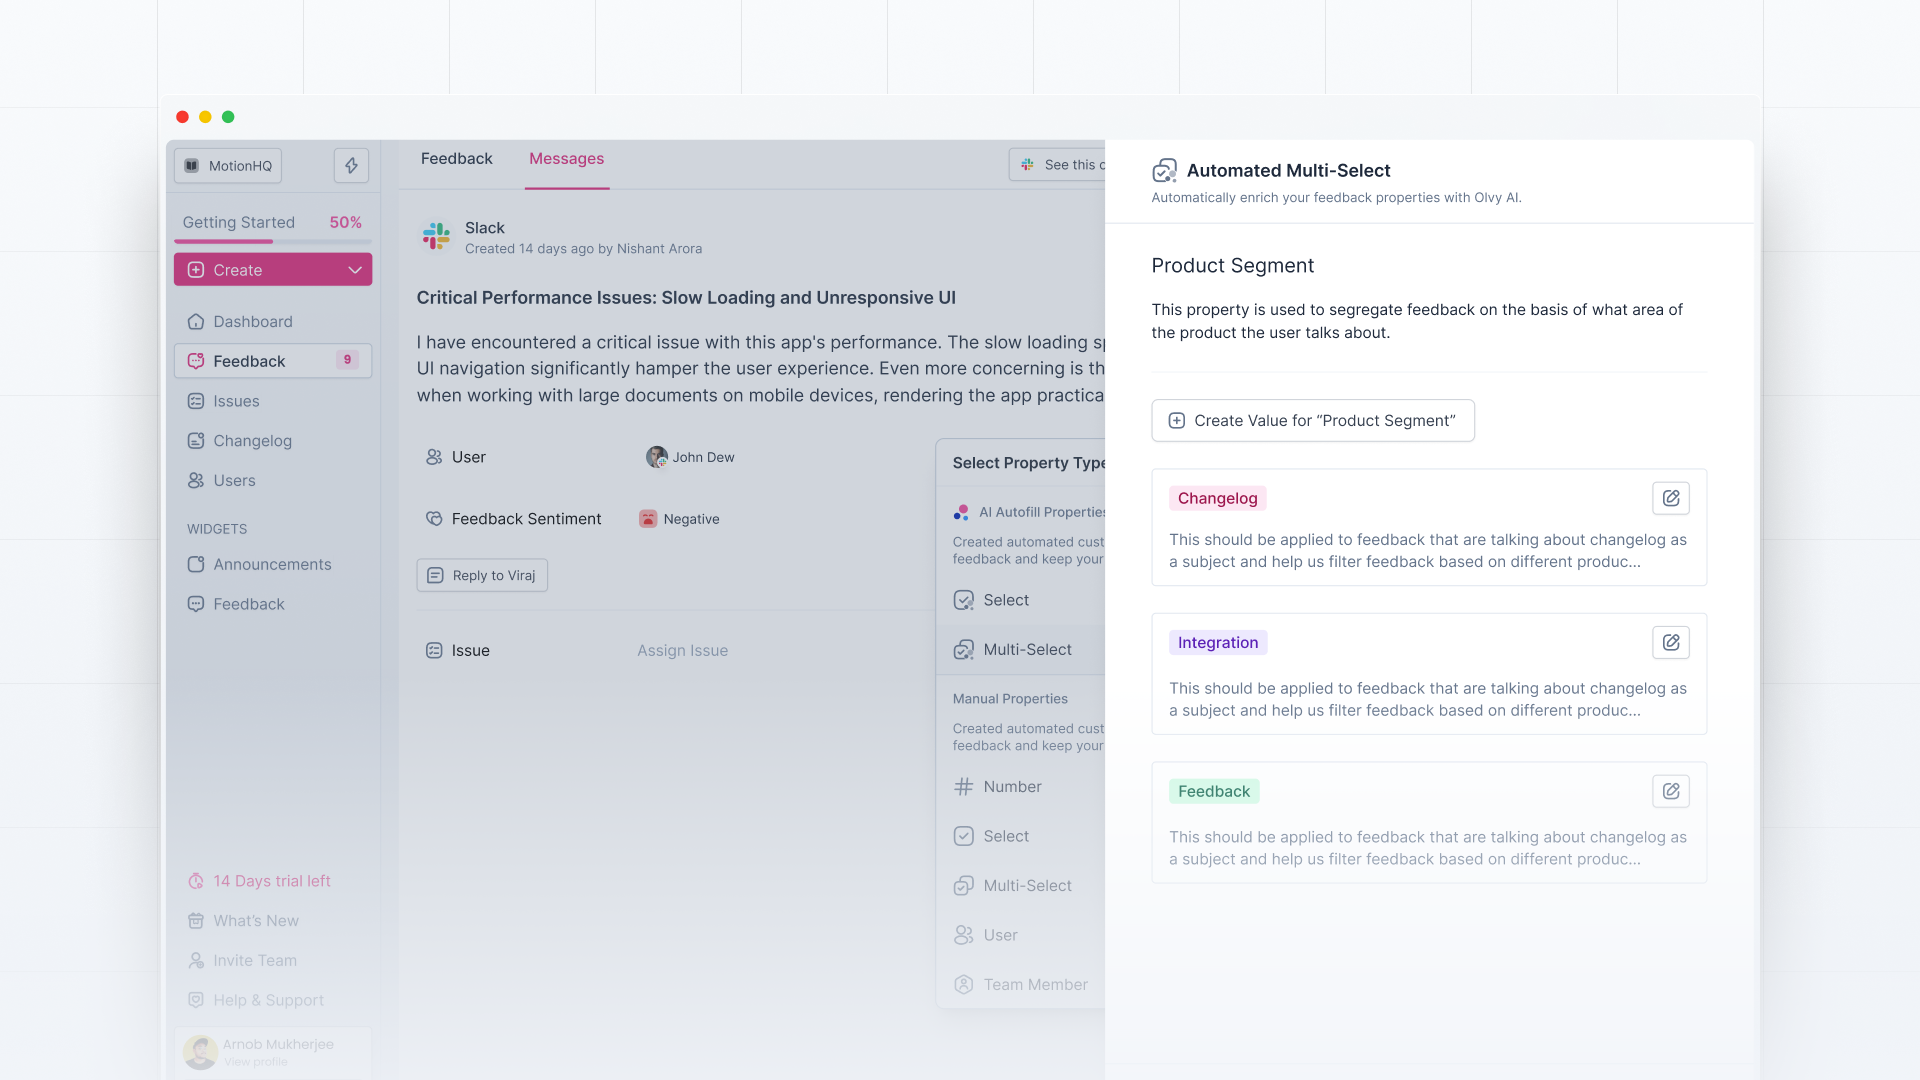
Creating Values for Autofills
Click on "Create Value" to create the autofills values that you want Olvy AI to tag to your feedback automatically.
Name it and describe how it aids in categorizing your feedback. This is crucial for Olvy AI to understand and accurately tag it to your feedback.
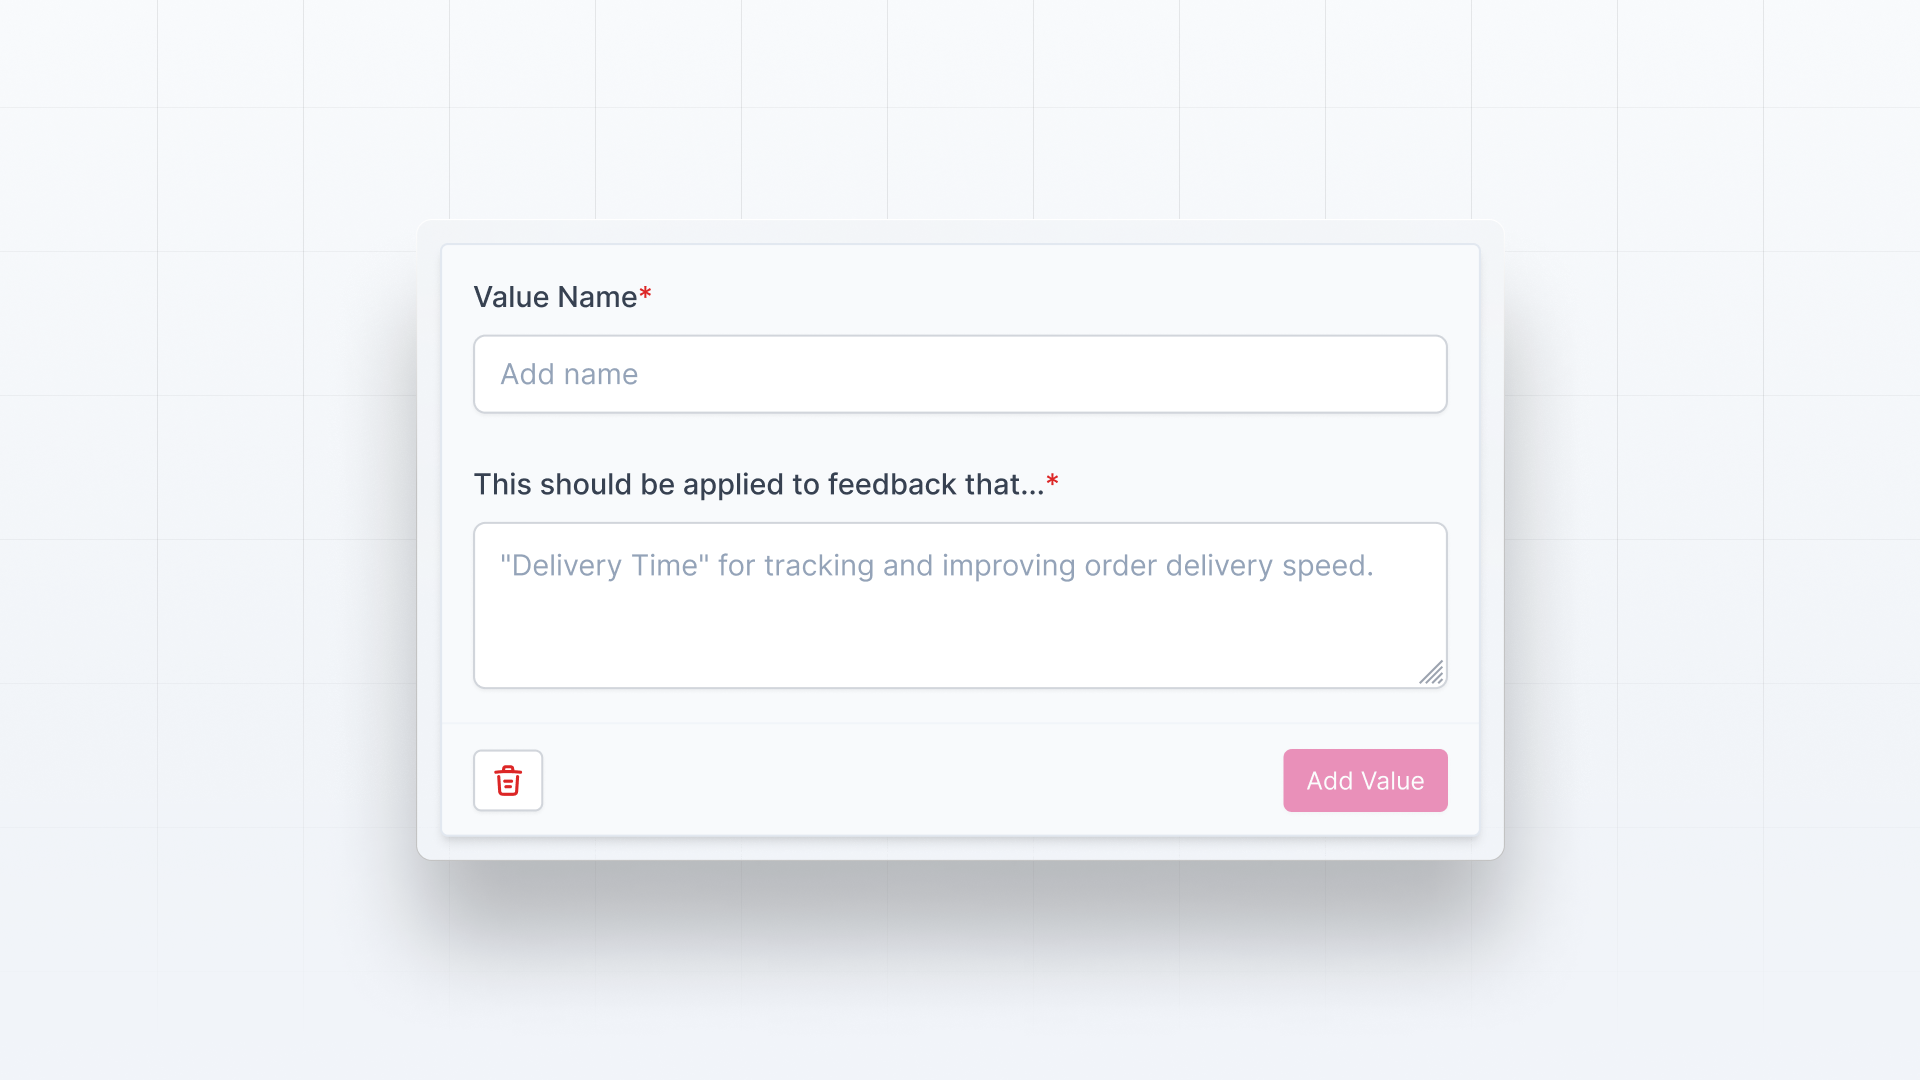
You can create as many of such values as your want with their relevant descriptions.
Feedback analysis using AI Autofills
Once done, you’re all sorted. Olvy AI Copilot will auto-tag your feedback by the custom property you created and will enrich your feedback. You can move over to your feedback feed to see it's magic!
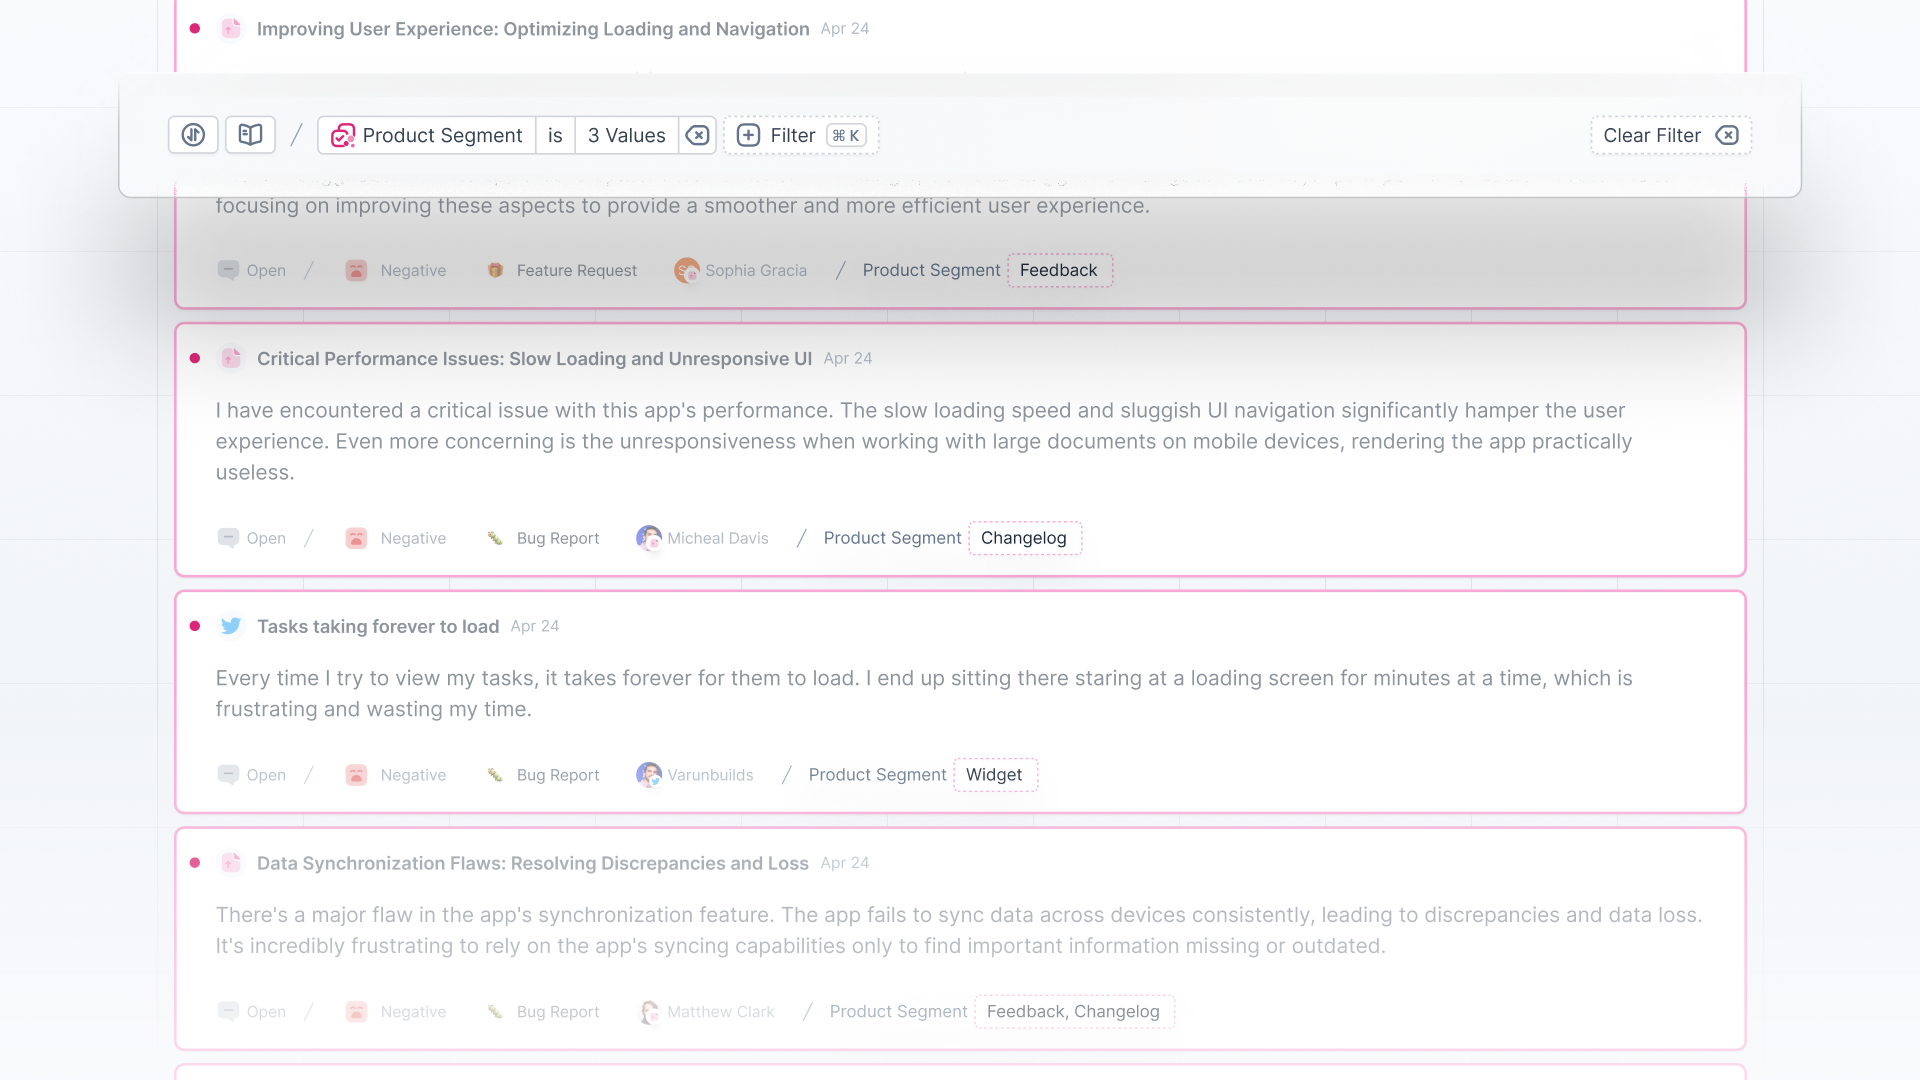
Olvy also allows you to add your custom properties as filters. Click on the filter to find and apply relevant values, streamlining feedback based on your custom properties.
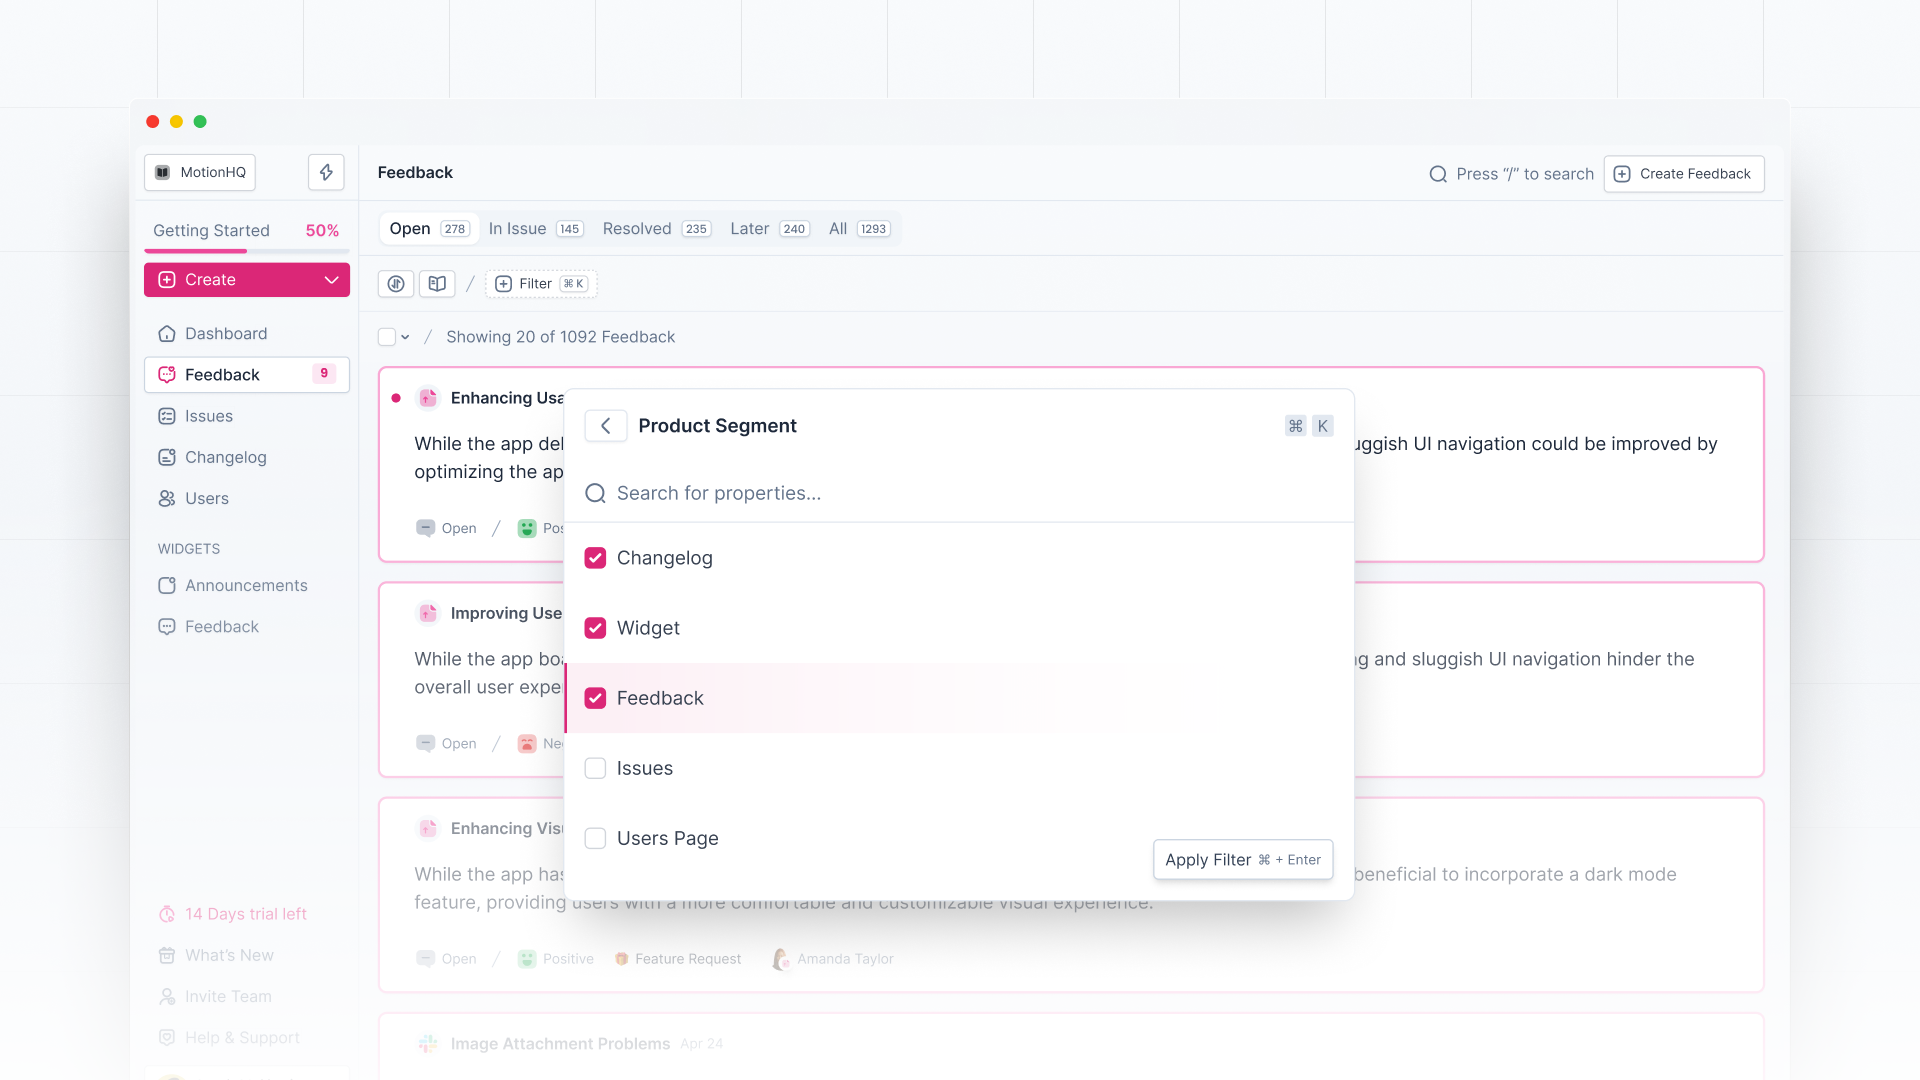
Once filtered, you can see your filtered values highlighted on the feedback card, giving you a quick idea about the feedback.
Managing Autofills Property
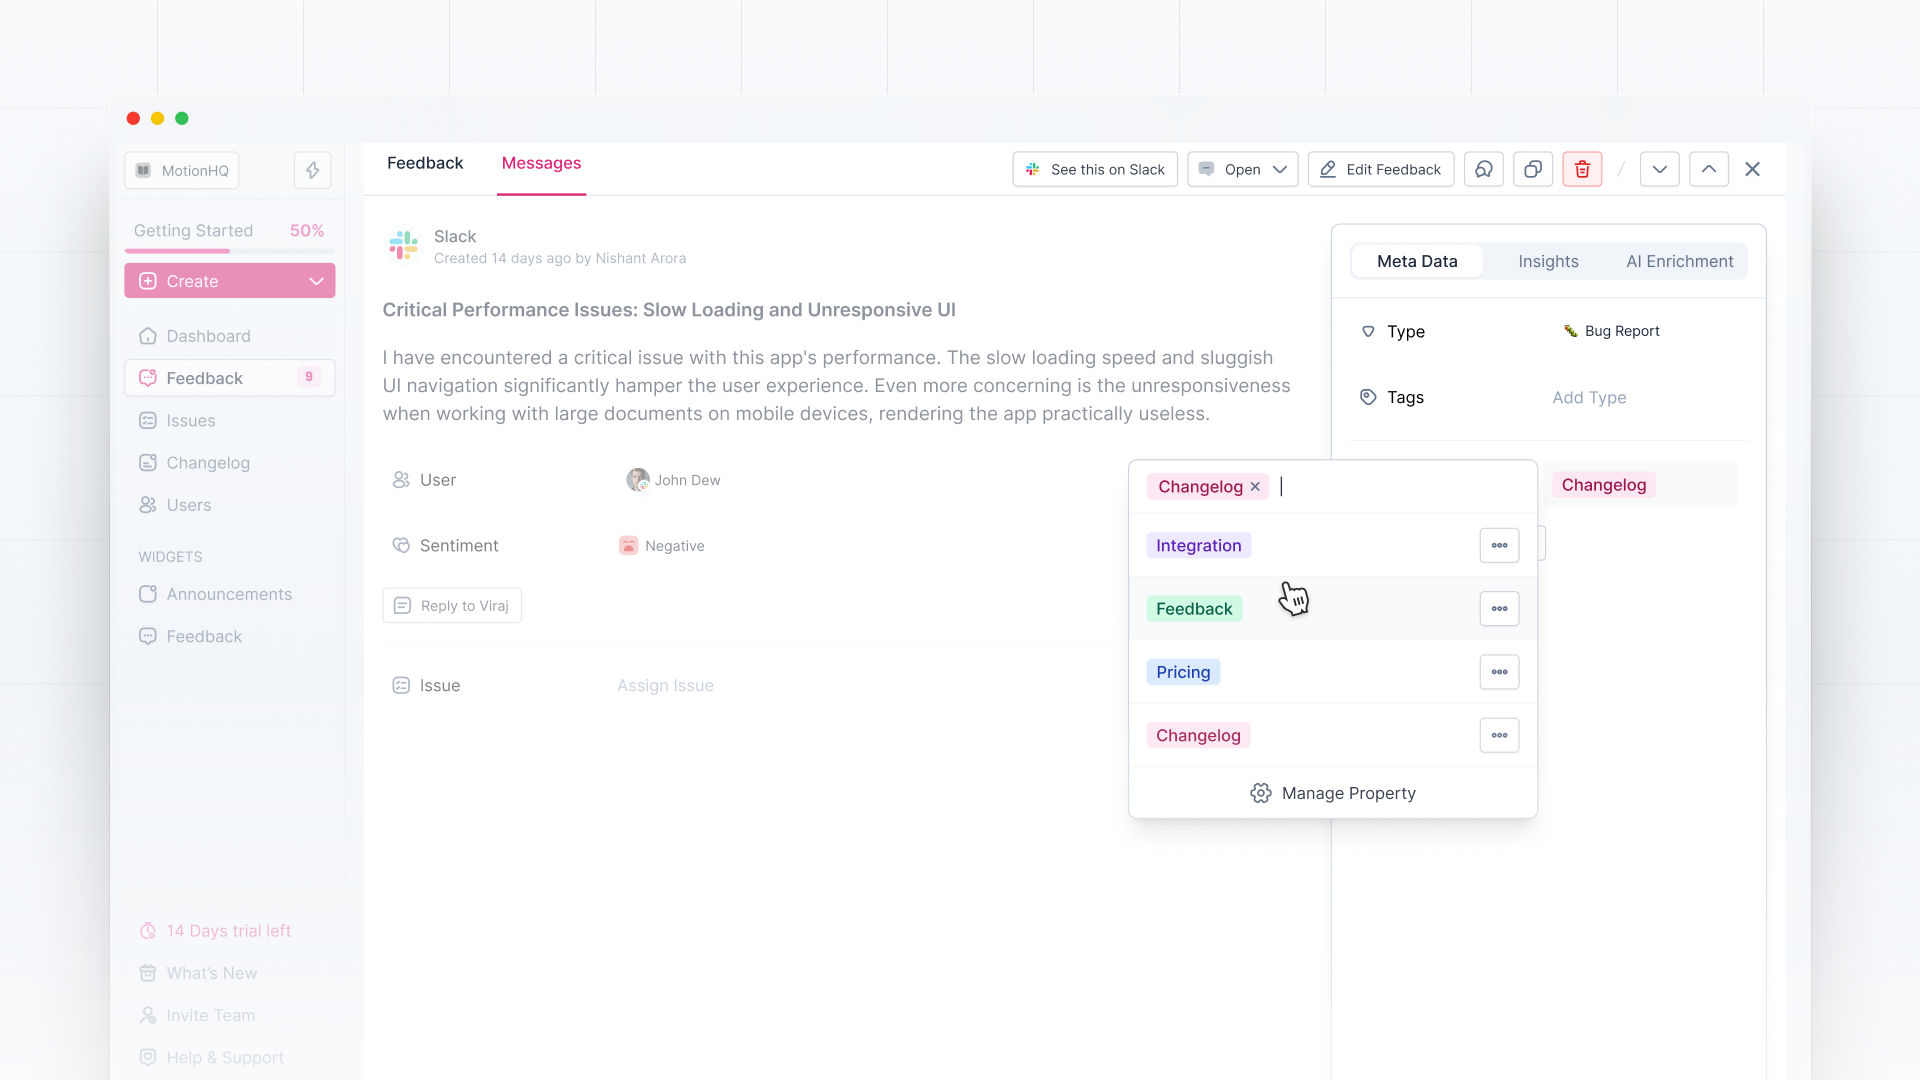
You can find autofill suggestions in the AI enrichment tab of each feedback profile.
Feel free to edit the value tagged with any feedback, this also improves Olvy's AI suggestions for your workspace.
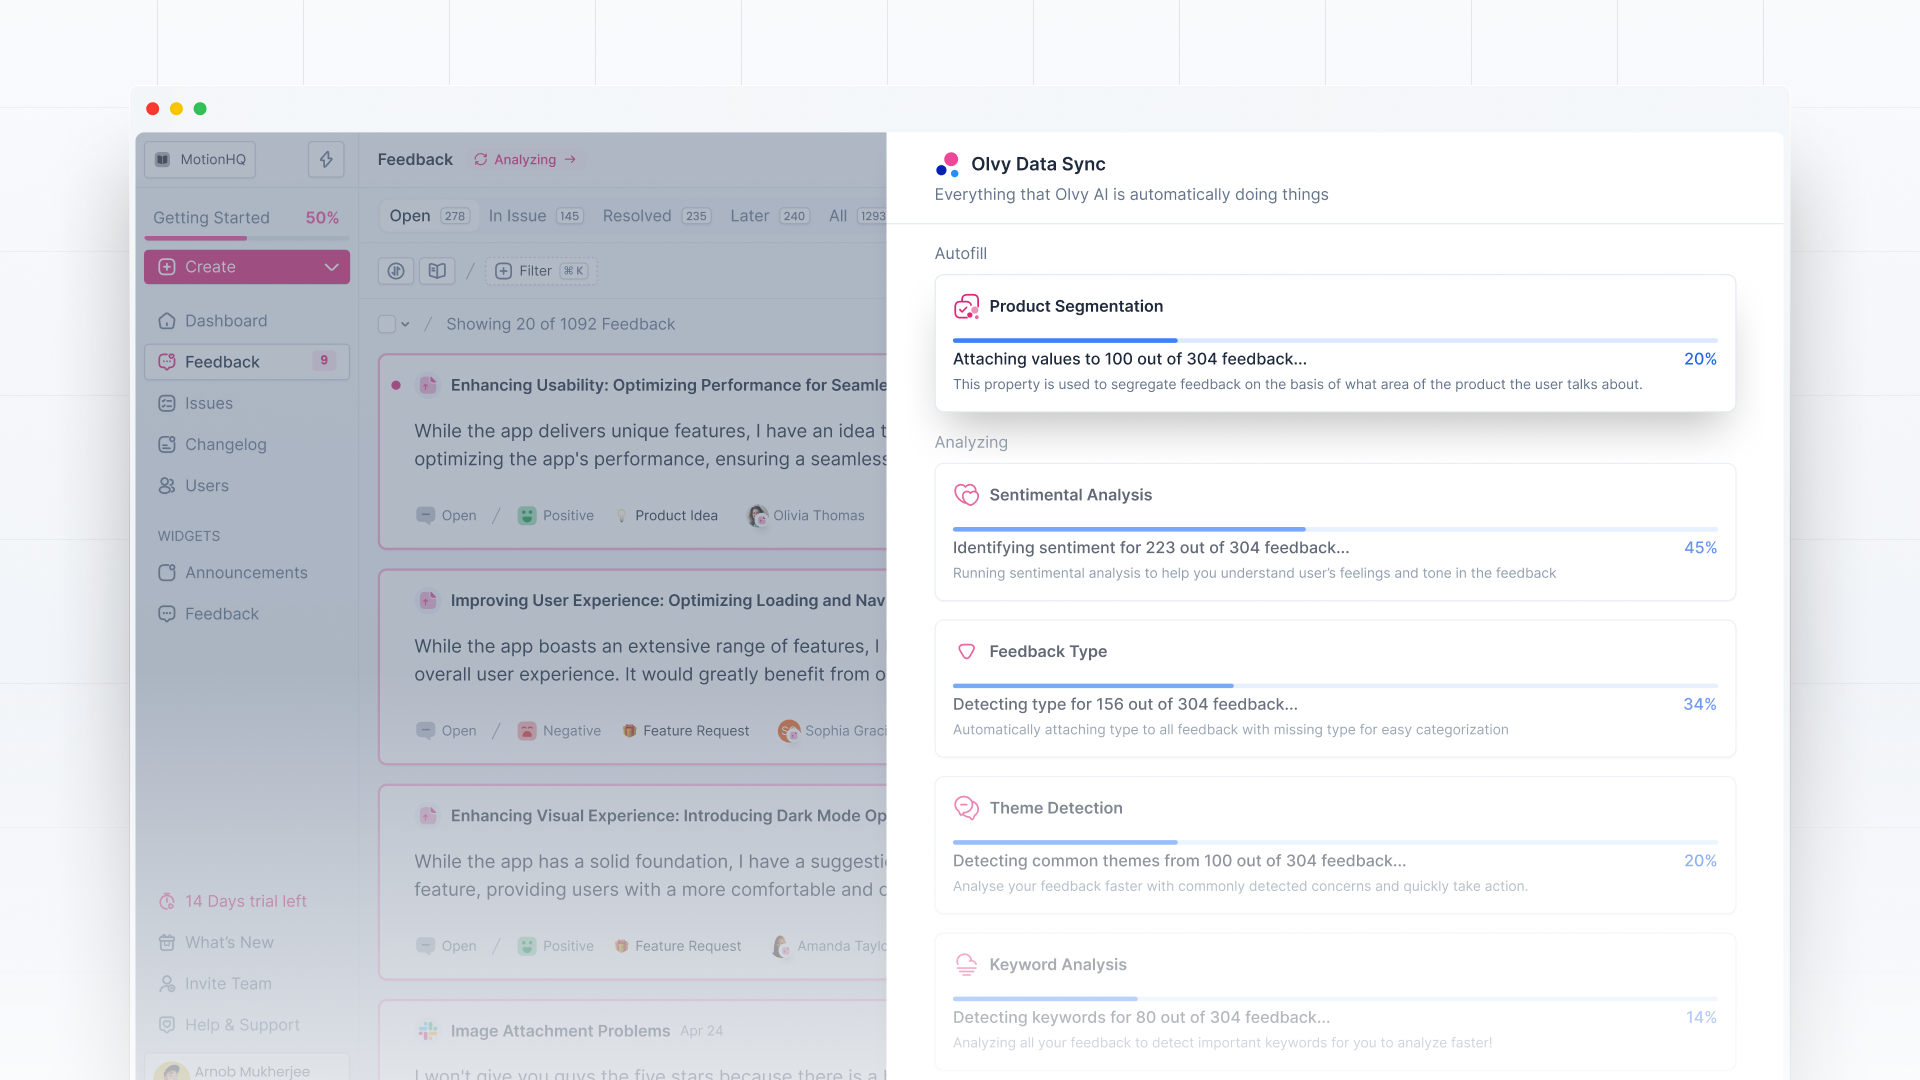
You can also check Autofill's analysis process from the Data Sync slideover, providing you with a transparent view of Olvy's analysis process.
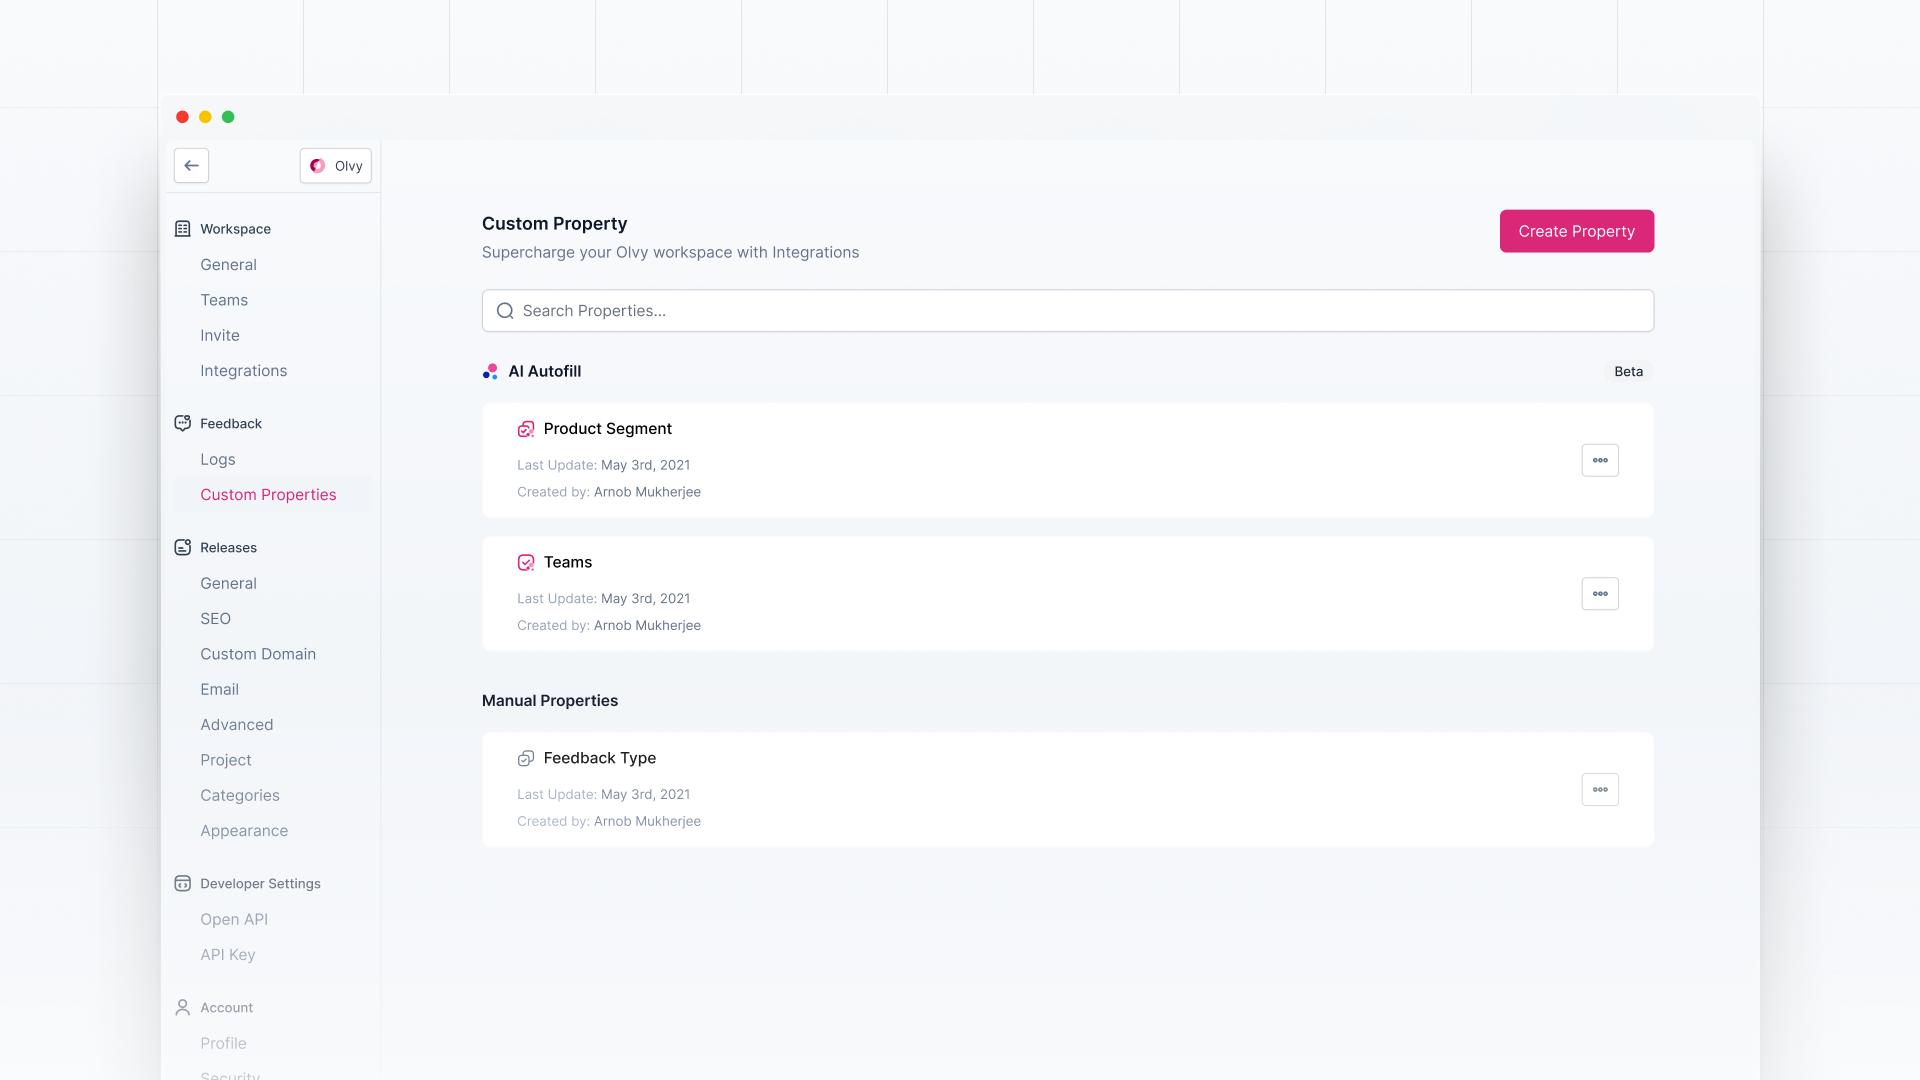
You can manage your AI autofill custom properties from it's workspace settings, where you can edit or delete existing ones or create new ones.
Here are some examples of how you can set an autofill and improve your analysis.